Entries List
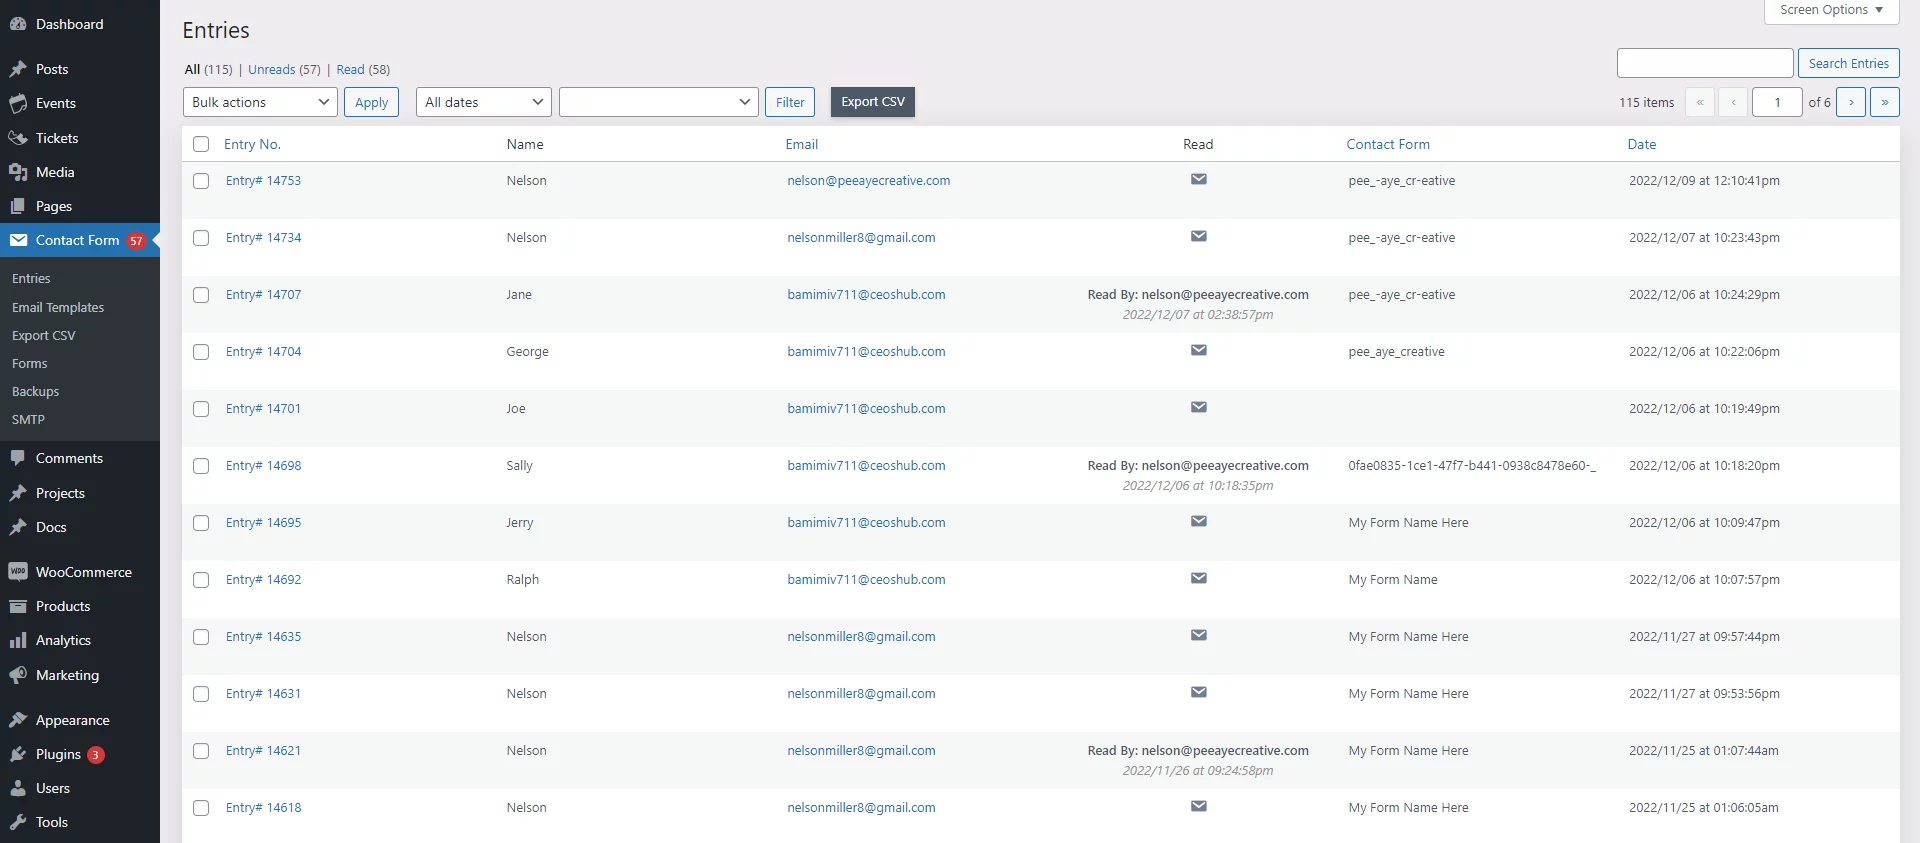
The Divi Contact Form Helper plugin provides a feature to save form entries to your website database when they are submitted through your Divi contact forms. These form entries can be viewed in the backend of your WordPress Dashboard by going to Contact Form>Entries. This screen will show a list of all the entries with various default columns showing specific details like entry number, sender email address, name, read or unread status, contact form submitted from, and date.

Individual Entry
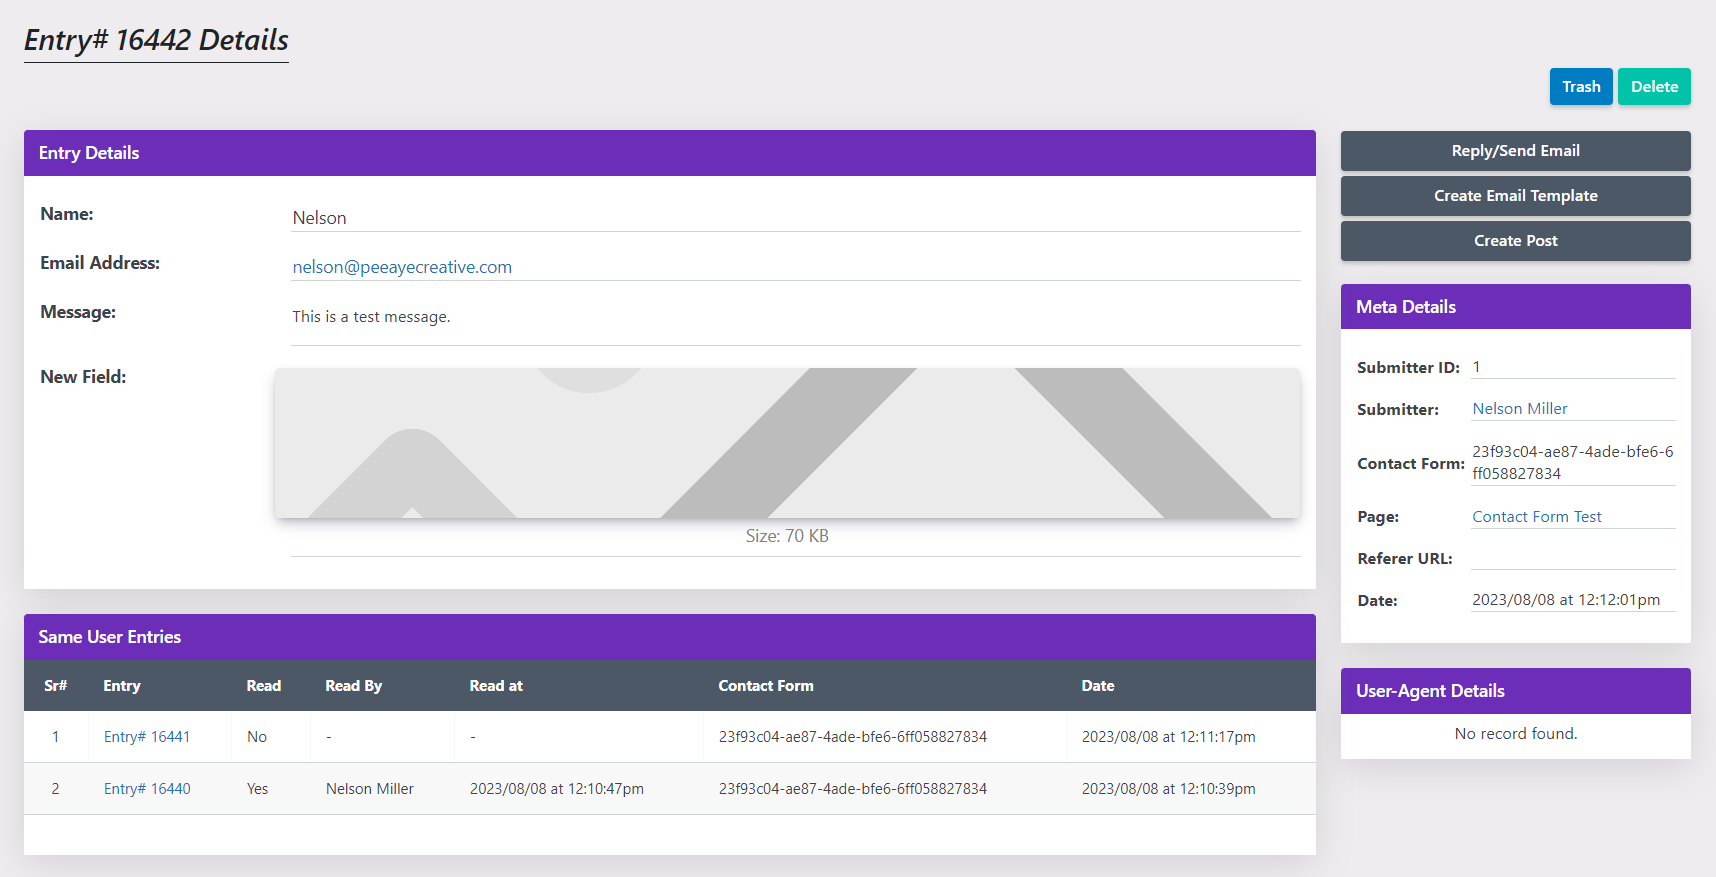
After clicking on an entry, you will see the individual from entry screen.

All the form fields will appear on the left side. In this example, Name, Email Address, Message, and New Field are the labels of the form fields used in the module. To the right of each of those is the data which was inputted into the form from the person who submitted it.
At the bottom are any other entries that are from the same person (based on email address).
On the right side are some actions you can do based on the entry. You can reply to the entry, create an email template from the entry, or create a post and map the fields to a custom post type from the entry.
Below that are the meta details such as the contact form used, the page, the referrer URL, and the date. Below that are any optional user agent details such as IP address, browser, and operating system.
Adding New Columns To The Entries Screen
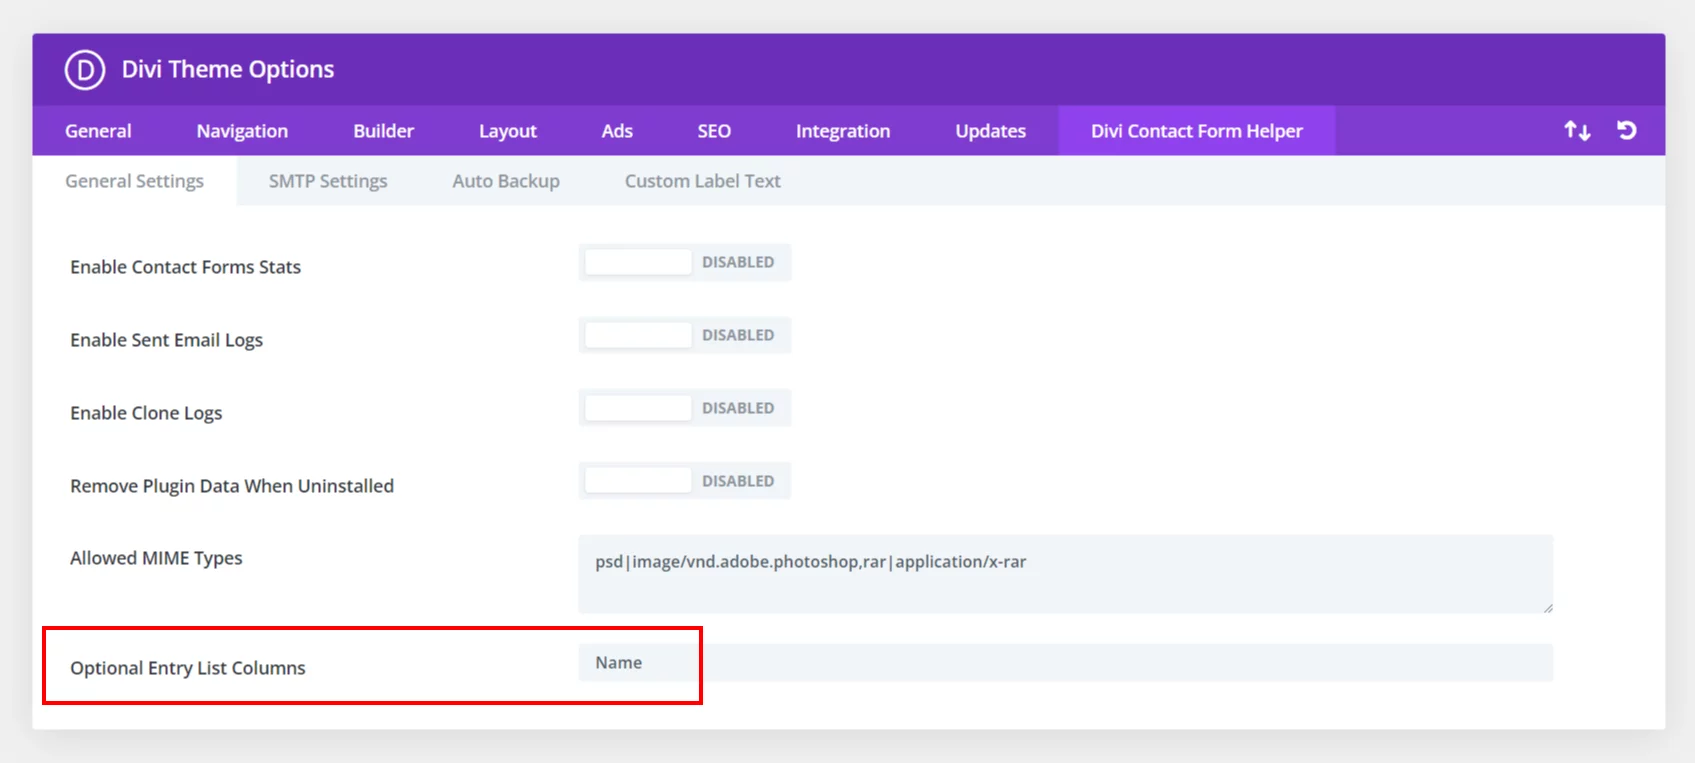
In version 1.4 we introduced a great new way to allow you to customize what you see on this Entries page. Go to Divi>Theme Options>Divi Contact Form Helper>General Settings and look for the Optional Entries List Columns setting. This input field will accept any form field ID used in a contact Form module. Any form ID that you enter here will show as an admin column in the Entries page. You can enter multiple field IDs separated by commas, and each will become a column in the entries list.

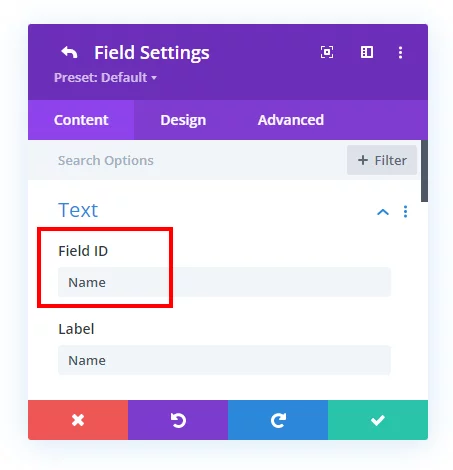
In the example above, you can see I have entered “Name” into the settings field. How did I choose that? That is because the field ID used in the Contact Form module is also called “Name” which you can see in the screenshot below.

Now that the field ID is entered, we will go to the Entries screen and see the new column. After receiving new form submissions, I can clearly see the name of the person submitting the form in the new column that was added!


