Overview
When you install the Divi Taxonomy Helper plugin, it adds settings to enable image support for taxonomies. This video and written documentation will guide you in enabling and adding the images.
How To Enable The Taxonomy Term Images Support
The first step in adding images to your taxonomies is to actually enable the feature. By default, these will be enabled when you activate the plugin, but it’s still a good idea to know where they are located, so you can enable or disable them as needed in the future.
From the backend of your WordPress Dashboard, go to the Divi>Theme Options. Once there, you will see a new tab added by our plugin called Divi Taxonomy Helper, with setting toggles below that are used to enable the new taxonomy term image.
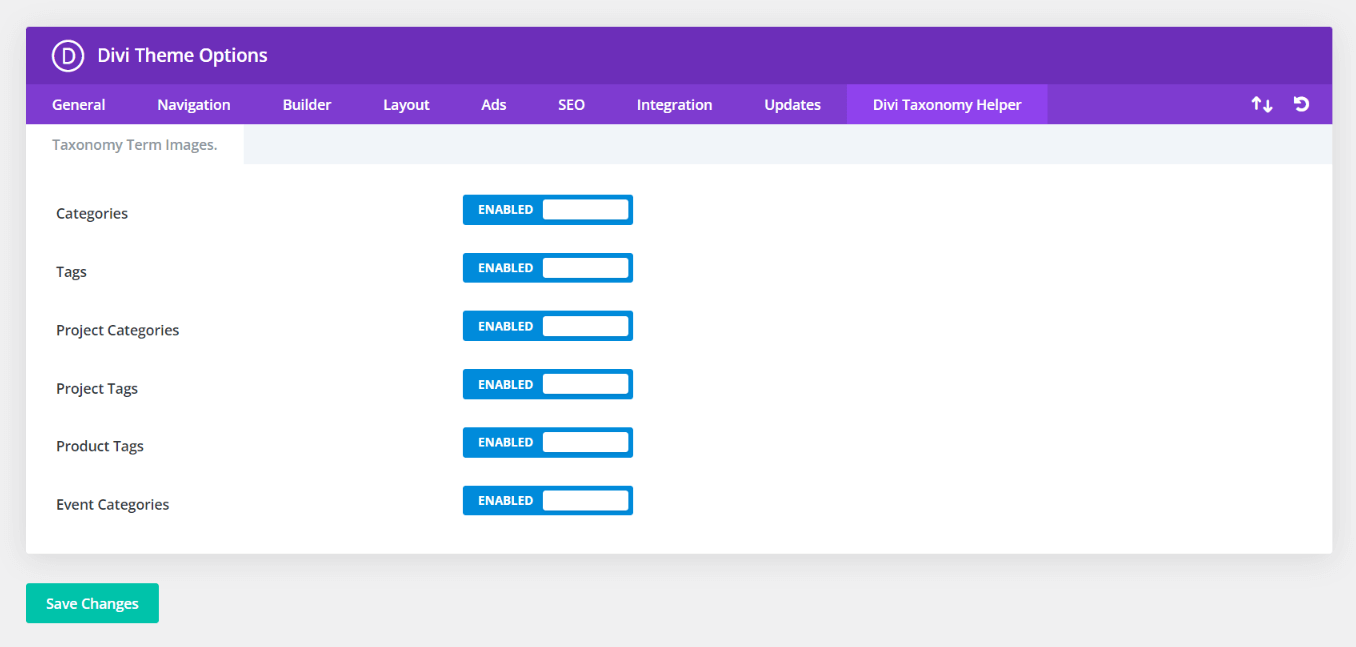
These settings allow you to add image support for whichever taxonomies you choose on your website. The plugin automatically supports any other taxonomy, such as Post Categories and Tags, the built-in Projects post type Project Categories and Project Tags, as well as other plugins such WooCommerce Product Categories and Tags, The Events Calendar Events Categories, LearnDash Course, Topic, and Lesson Categories, custom taxonomies, etc.
How To Add Images To Taxonomy Terms
After the taxonomy image support is enabled in the settings, it’s time to get started adding the actual images to your taxonomy terms. The process for adding the images will be exactly the same for any taxonomy, but in our example we will use the default blog posts Categories.
From the WordPress Dashboard, use the admin menu on the left side to navigate to the taxonomy of your choice. These are located under the main post type menu item, so in our example the Categories is located in the Posts menu item. Hover over the menu item and click on the taxonomy.
This brings you to a list of all the blog post Categories on your site.
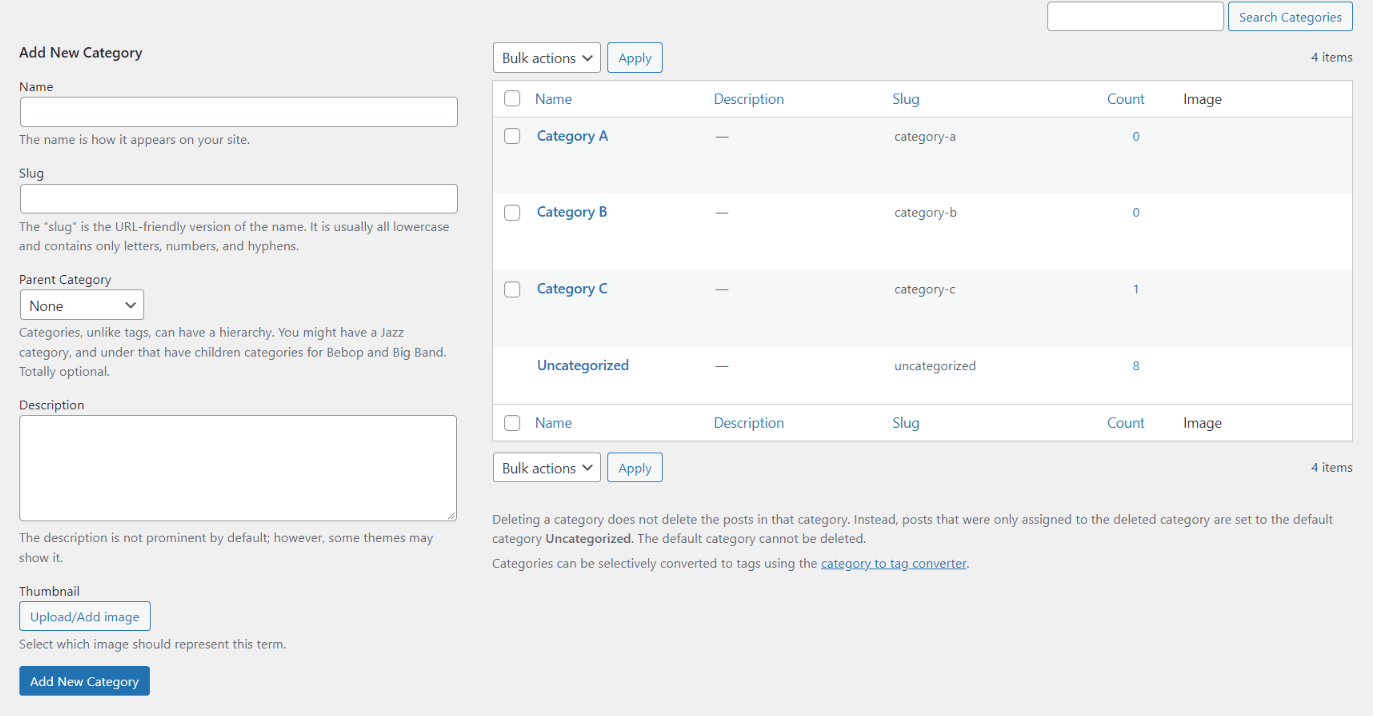
If you don’t have any categories added, you can create them, otherwise we will be editing the already existing categories. Click on the title or hover over the item and click the edit button to open the settings for each category.
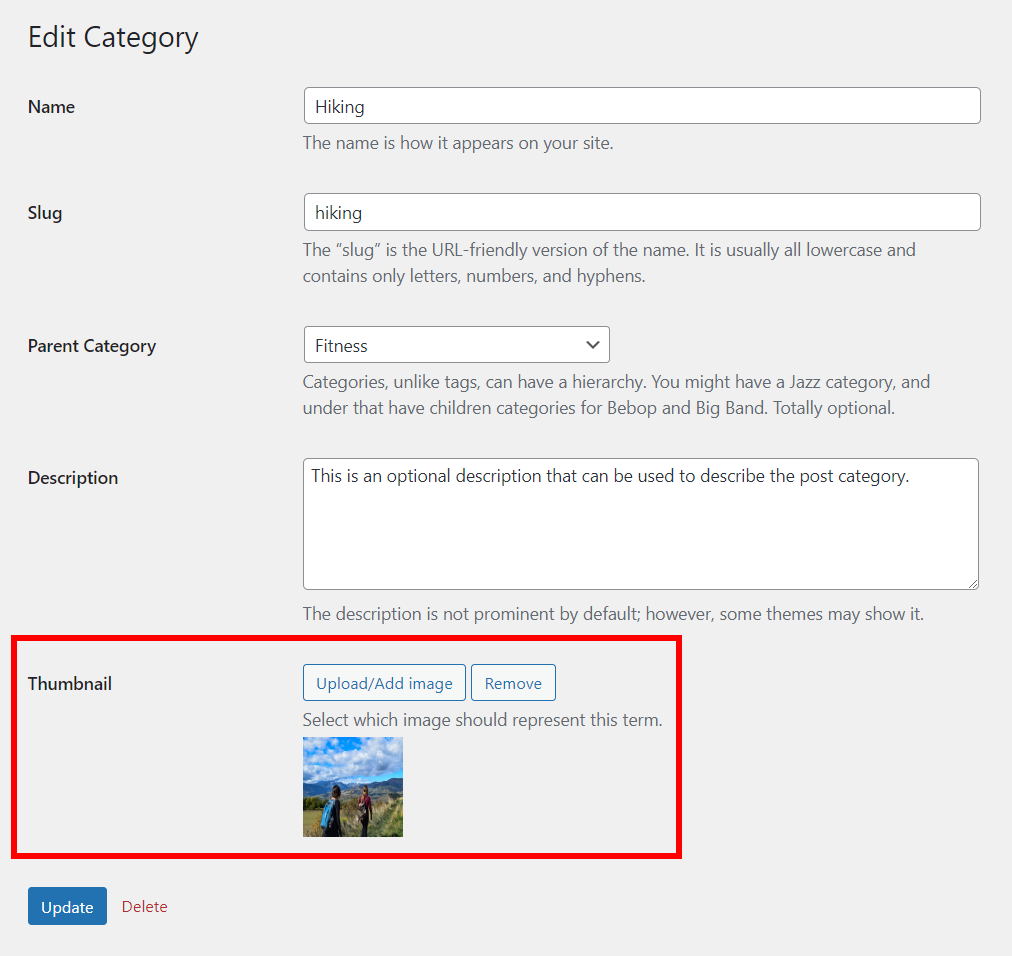
At the bottom, you will see a new Thumbnail setting has been added by our plugin. Simply click on the Upload/Add Image button, and select an image that represents that category from your Media Library or computer.
It couldn’t get much easier than that. After an image has been added, you can easily replace or remove it. To replace an image, click the Upload/Add Image button again and select your image. To remove an image, click the Remove button.
Add A Description
The description field comes by default with WordPress. This description is used by our Taxonomies module, similar to how an excerpt would be used to give display a short summary of the taxonomy. We recommend adding descriptions to all your taxonomies so that they can be used in our Taxonomies module. You can also use the description with dynamic content along with the image in the Theme Builder templates.
