Make Bookings, Set Appointments, Schedule Dates With The Divi Contact Form!
If you are familiar with Divi then you know their built-in contact form module does not have any date picker options. But we know this is a popular feature in contact forms, so as usual here at Pee-Aye Creative with our tutorials and products we created the solution for you! Adding a date and timer picker with all the options requires our Divi Contact Form Helper plugin to work, since this kind of thing can only be achieved with a plugin. This guide will show you how to enable and use the features and settings related to date and time picker.
▶️ Please watch the video above to get all the exciting details! 👆
1. Install The Divi Contact Form Helper Plugin
The first step to set up the date and time field in the Divi Contact Form module is to purchase, download, and install the Divi Contact Form Helper plugin. Please note, this feature is not included in Divi and is impossible without our plugin, so we hope you enjoy this exciting feature!
FYI: Our plugin adds settings directly to the existing Divi contact Form module, which is super awesome and unique!
2. Add And Set Up A New Date/Time Picker Field
Add A New Field
After installing and activating the plugin, the next step is to add a new field to your new or existing Contact Form module. Open up the module settings window where you will see a list of fields that are already added. Here you can add a new field by clicking the Add New Field (+) button.
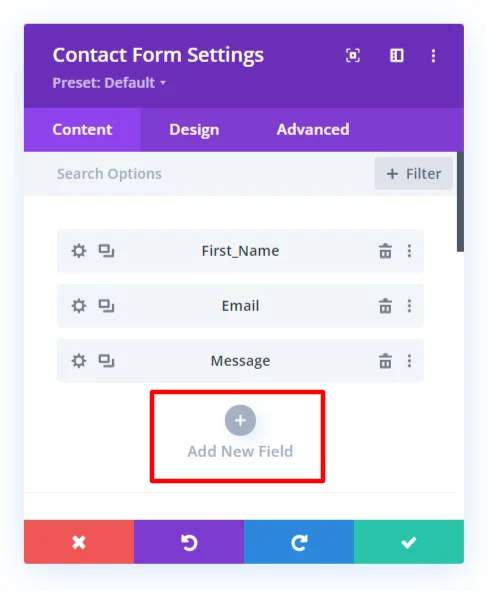
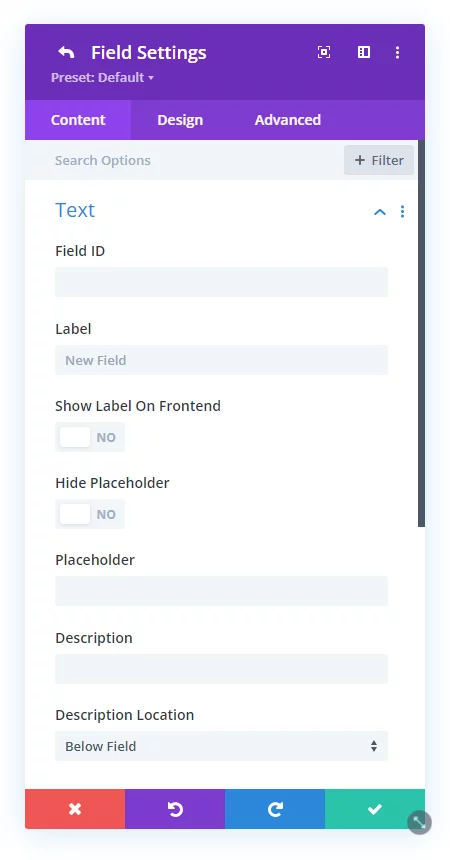
Clicking on the add new field button will open an inner window with all the options for that particular field. There are a coupon of things to note here.
The Text toggle will automatically be open first by default. You can complete these options according to your preferences.
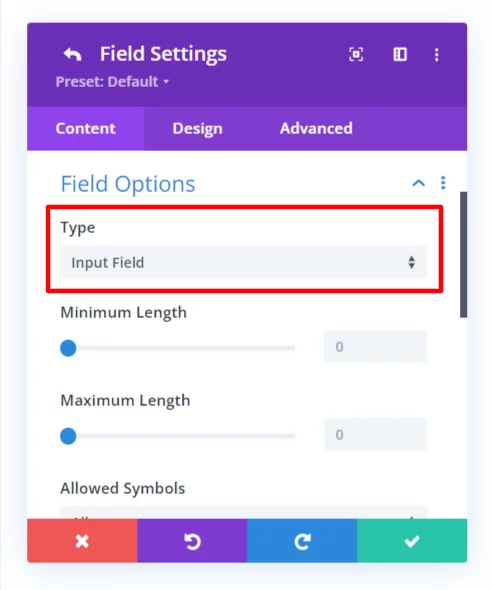
Next, open the Field Options toggle and double-check the Type dropdown. This should already be set to Input Field by default, but if not, make sure it is selected. (This may seem confusing, but it’s not possible for our plugin to add an actual new field type, so we need to select Input Field and then modify it with other custom settings.)
Enable The Date/Time Picker
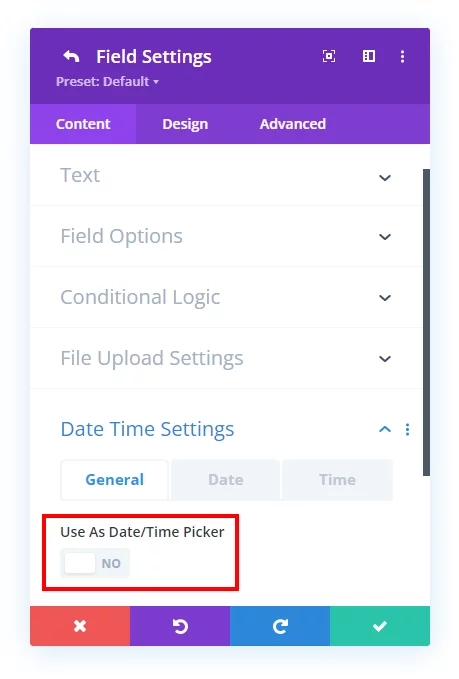
The main step inside the inner field settings is to locate the Date Time Settings toggle and open it.
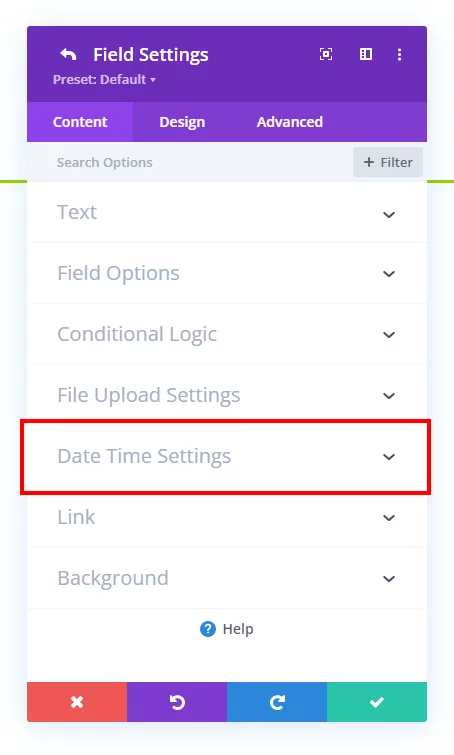
Inside the Date Timer Settings toggle in the General tab you will see a new setting which is added by our Divi contact Form Helper plugin called “Use As Date/Timer Picker.” Change this toggle to YES to enable the date and/or time picker settings.
3. Adjust the Date/Time Picker Settings
When you enable the Use As Date/Timer Picker setting, it will immediately show all the plugin’s custom settings related to setting up the date picker and/or time picker. There are many, many options to choose here, so take your time and explore them and adjust anything to suit your needs and preferences.
General Settings
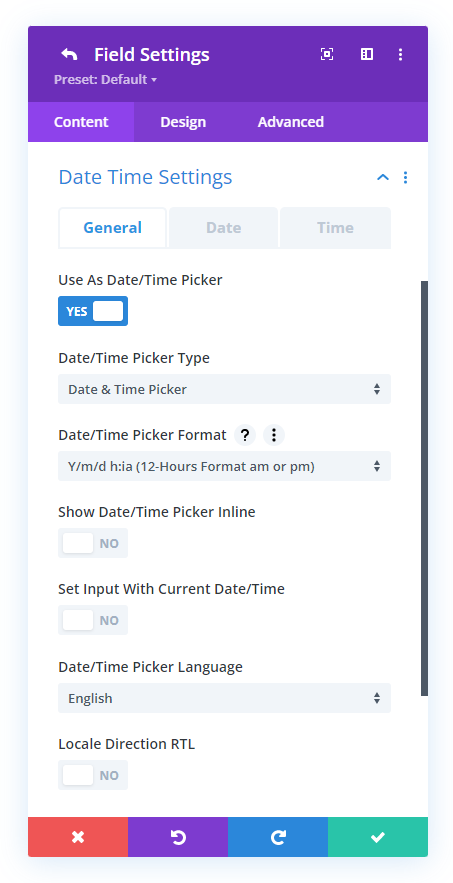
The General tab is where you choose things like whether this is a date picker, a time picker, or both combined. Here you can select from a list of format options. You can choose to show the date/timer picker inline, meaning it shows on the page without clicking into the field, or leave it off to show when you click. There are language options and an option to set the current date and time as the placeholder.
Date Settings
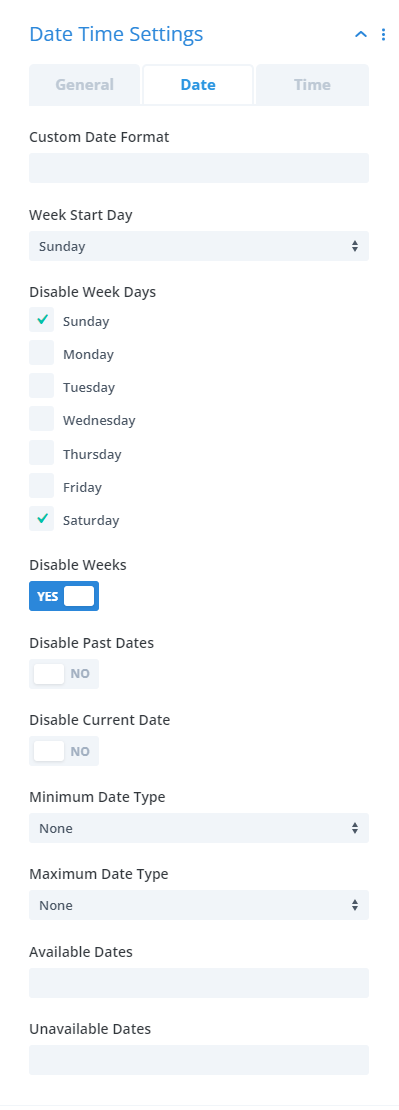
This Date tab has everything related specifically to the date picker. Here you can input a custom date format, choose the week start day, select any days of the week you want to disable, disable past and current dates from being selectable, set minimum and maximum dates that can be selected by a relative number or a fixed date, and set specific dates that are available or unavailable.
Time Settings
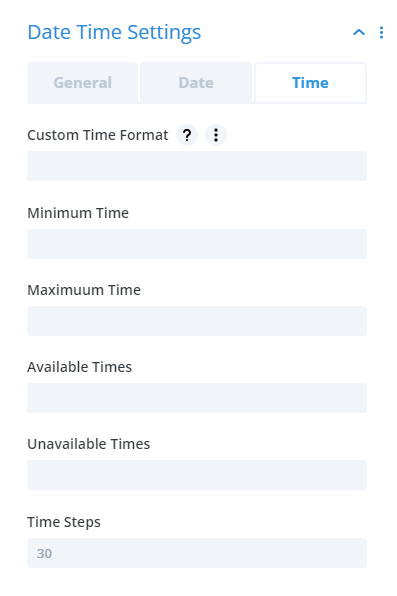
This Time tab has everything related specifically to the time picker. Here you can input a custom time format, input a minimum and maximum time that is allowed to be selected, set specific times of the day that are available or unavailable, and choose the time steps in minutes between each available time. (*NOTE we plan to add more features here for setting times per day.)
4. Adjust the Date/Time Picker Design Styling
As if all those functionality settings were not enough, we also provide hundreds of design settings to style and customize every aspect of the date and time picker.
General Design Settings
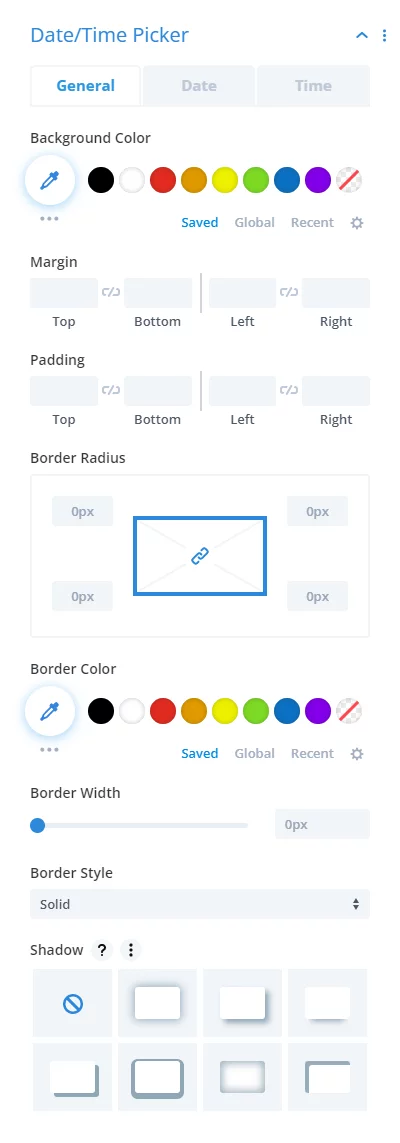
The General tab is where you style the overall date/time picker container and includes all the standard options like background color, margin and padding, border settings, and box shadow settings.
Date Picker Design Settings
This Date tab has all the styling options related to the date picker. This includes a crazy amount of options, and there’s too many to list, so have a look and see that everything has settings for it!

Time Picker Design Settings
This Time tab has all the styling options related to the time picker. Just like for the date picker, we include every setting imaginable, so check the screenshot and you will see you can customize everything!




Very useful and interesting.
Your items are always of superior quality.
Congratulations, it was useful for a customer.:-)
Thank u buddy!
Thank you Gio, your kind words and feedback are greatly appreciated!
Thank you for the detailed tutorial. It really helped!
Hi Christina, I’m so glad you like it! You are most welcome!
Hi there
When I activate the plugin, I get this error message on the error log:
PHP Fatal error: Maximum execution time of 30 seconds exceeded in /var/www/htdocs/wp-content/plugins/date-time-picker-field/includes/DateTimePicker.php on line 431
The site will not load when the plugin is activated. Do you know why?
Thanks
Hi Jake, not really sure. Do they mention that in their support anywhere? Try again, could be hosting too.
Hi Nelson, I have use this plugin a couple of times and it really solve the problem.
You Rock ! Awesome, thanks for your great job
Thanks Chris!
Hey, it’s really good stuff. I find booking slot system for saloon
and suddenly I find this guy !!!!
I’m glad you found our tutorials! Be sure to check the hundreds of other posts as well! 🙂
thank you so much!
You are welcome, Hallie!
hello, where can he change the time format
Hi Emrah, their plugin has time format in the settings.
Nice! Thanks
You’re welcome!
Thank you for this awesome tutorial. Keep up the good work.
I followed your tutorial using the contact form and it worked for me. Thank you.
Also, I installed Popup for Divi plugin but it didn’t work.
Could you give me a guide, please?
You’re welcome, glad you enjoyed it!
I’m not sure about the popup, maybe they have some conflict. You can reach out to support about that.
Howdy! I have to place some compliments now. I have been using divi for some serveral years now so i can defenitly say:
this is another excellent plugin by pee-aye creative! splendid! A transatlantic Big Thank You from germany!
Equal goes for the Tab-Plugin.
Thank you so much Frank! If you have a minute, feel free to leave an official review on the product page!
You’ve done it again sir! Glad I purchased the lifetime of Divi Adventure Club – keep finding more and more things you’ve made easier 🙂 Thanks!
Hi Jemma,
Thanks you so much, welcome to the club! I am really glad to hear you are finding the resources valueable!
Hi Nelson!
I’m encountering an issue with the Divi contact form date picker on my website.
Visitors can book the same date and time multiple times.
How can I prevent this?
Your help is appreciated.
Hi Matt!
How many date pickers are you using in the form?