Introduction To Divi Staging Sites
The subject of this guide is very important, and yet so often a staging site is only considered after it is too late. Don’t let this be your story! Everyone should know the importance of a staging website and know how to use one. In this tutorial, I will explain what a staging site is and how to set one up and use it for your Divi website.
▶️ Please watch the video above to get all the exciting details! 👆
What Is A Staging Site?
A staging website is an identical clone of the live website which can be used for all kinds of testing and coding purposes. It is an isolated WordPress environment totally separate from the live site. By default, they are usually private and not accessible to the public or search engines.
What Are Staging Sites Used For?
A staging site can serve several purposes, but mostly they are used as a sandbox or playground in order to test changes to the site. They are perfect for writing and testing any kind of custom code like JS and PHP, eliminating the chance of breaking the live site. They are great for testing plugin and theme updates that you want to make sure are working before trying it on the live site. Making edits and updates directly on the live site definitely contains a risk of errors, messing up the design, or breaking the site. If you make the edits or updates on the staging site first, it allows you to test to see everything works and looks good. Then, once you are ready, you can merge the changes into the live site very easily.
Why Is A Divi Staging Site So important?
It may be difficult for you to identify with the need for a stating site. If you never faced any problem with your site before, then you probably are questioning its importance. But sadly, most people learn the importance of this kind of lesson the hard way. Don’t be one of those people! Learn from us and thank us later.
Prevent Embarrassment
Let’s see if an example will help explain the importance of using a staging site. Suppose you are working on your WordPress website, and you see a notification that your Divi theme or a plugin has a new update. Naturally, you get excited over this, and eagerly anticipate using the new features. So you click update! After installing the theme or plugin update, you move on and go about your business.
Later in the week, you get a message from a customer or potential customer asking why your site is all messed up or down completely. Embarrassed and concerned, you quickly log into your site and check it. Sure enough, you realize that things are not well.
Save Your Reputation
A broken or down website negatively impacts your reputation and causes customers or potential customers to lose trust in your products or services. Seeing errors on the site causes security and reliability concerns. Not to mention that this will also affect your analytics and SEO ratings. Suppose some potential customers or clients visited your site and saw the issue? Most likely they moved on and will not return.
Enjoy Peace Of Mind
Unless you like stress, panic, embarrassment, and loss of business, then a stating site is the perfect way to enjoy peace of mind when you need to make changes to your site. If you are updating old plugins, themes, or the WordPress core, or if you are adding custom PHP, then you are venturing into the great unknown. Why not give yourself a break, and simply test it first on your staging site?
Method #1: Create A Staging Site For Divi Using Your Hosting Provider
The Easiest And Recommended Method
The easiest method, and the one I recommend, is to use your hosting provider’s built-in staging site feature. This will be the easiest and seamless method, usually a 1-click functionality that is pretty awesome to use. There is very little work involved with this method.
All Good Hosting Companies Have A Staging Feature
All good hosting companies offer website staging as a feature. I am alarmed to learn that many WordPress and Divi users are not using staging sites, or even worse, that their cheap hosts are not providing this basic feature for free! Shame on any host not including this! If your host does not provide a staging feature built-in, then I will be blunt. Switch hosts! If they don’t offer it, then quite frankly they are not a good hosting company because having the ability to stage your website is an absolutely essential feature. Be sure to check our recommended hosting providers for Divi!
Locate The Staging Feature In Your Hosting Account
If you are new to this topic, I suggest opening a new tab right now and logging into your hosting account. Try to find the information about a staging site. If you need help finding it, check their documentation or contact their support. It is very important to understand where the features are located, and how to do create and manage the staging site.
Become Familiar With The Staging Feature
If you are using one of our recommended hosting providers for Divi, then you can follow the instructions provided in the next few steps. We cover Siteground and Cloudways in the video and written guide, but if you use another company it should be pretty similar. Try to find the same settings in your hosting account and follow along.
Siteground Hosting Staging Site Example
Siteground is one of my personal recommended hosts for Divi. They have their own built-in staging tool that is really easy to use! If you are using Siteground and want to create a staging site, be sure to follow their own full guides on their site: How To Use SiteGround Staging Tool.
To set up the staging site with Siteground, you need to follow these steps:
Create A New Staging Website
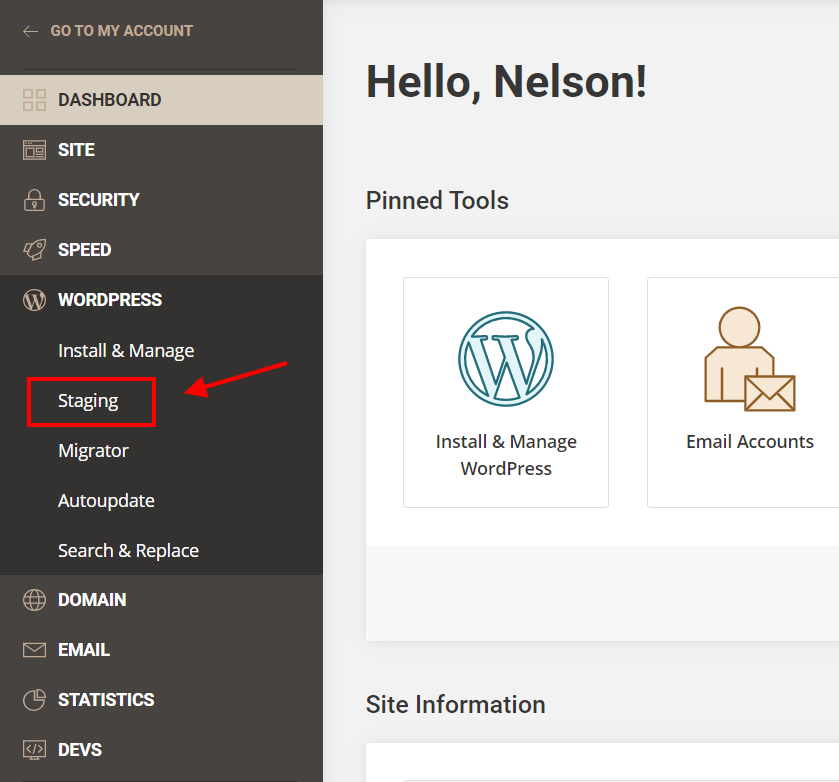
Go to the Siteground and login into your account. From the Websites tab, locate the website and click on Site Tools. Once inside the Site Tools, click on WordPress in the menu on the left-hand side and then click on Staging.
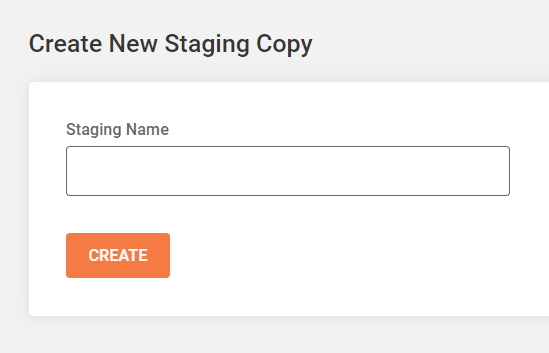
Look for the option to “Create New Staging Copy” and type in some name for your site. Then click the orange “Create” button to create your staging website.
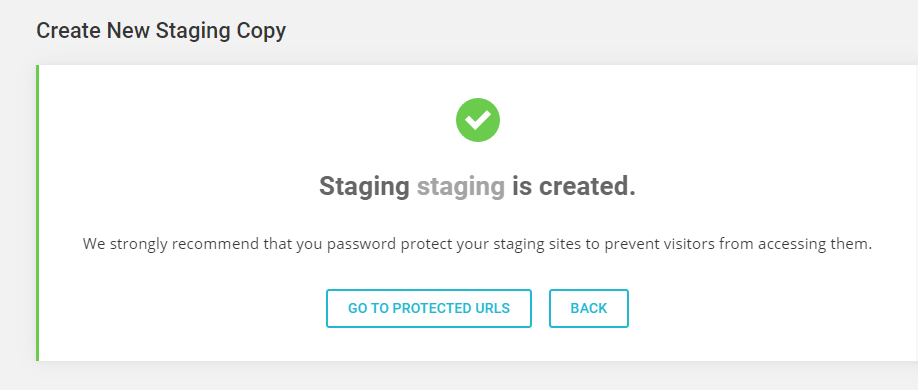
The system will then process the request, and when it is completed you will see a confirmation stating the staging site has been created.
You will also notice that the site appears as a staging copy in the list down below.

Edit Your Staging Website
Now that you have made a copy of the site, you can go ahead and make the changes on the staging site. So this is when you can test your code, update the Divi theme, update plugins, etc.
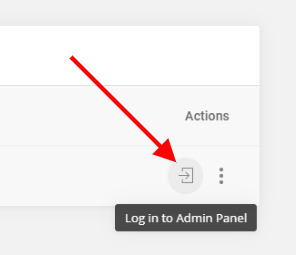
You can access the WordPress staging site by clicking the login icon.
Deploy The Changes To The Live Site
Once you are done making changes or updates to your staging copy, and you have checked your site and are happy with the result, you can proceed with deploying the changes and replace your live site with the staging copy. To do this, click the menu to reveal the available staging site options that Siteground provides.
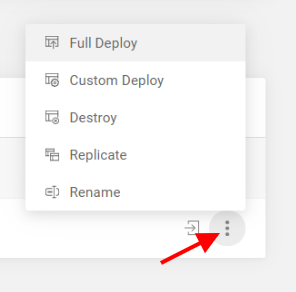
Full Deploy – this option is used to completely merge the staging with the live site. All files and the database on the live site will be replaced with those of the staging copy.
Custom Deploy – this option will compare all changes you’ve made to the files and database of your staging copy with the current live site and gives you the options on what you want to update. This is meant to give you control on every part of the copy that will be deployed to live.
Cloudways Hosting Staging Site Example
Cloudways is also one of my personal recommended hosts for Divi. They have their own built-in staging tool that is really easy to use! If you are using Cloudways hosting and want to create a staging site, be sure to follow their own full guides on their site: How To Create A Cloudways Staging Environment.
To set up the staging site with Cloudways, follow these steps:
Create The Staging Application
Log into your Cloudways account and go to your server and applications. The key here is to click into an application first. Then, once you are viewing an application, go to the bottom right corner of your screen and hover over the orange grid menu icon. Some options will appear, including one called “Clone App/Create Staging.” Click on this option.
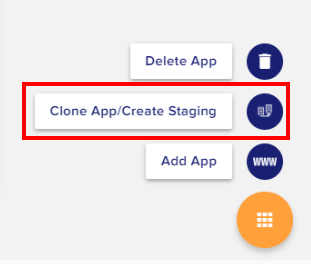
A dialog box will appear like this.
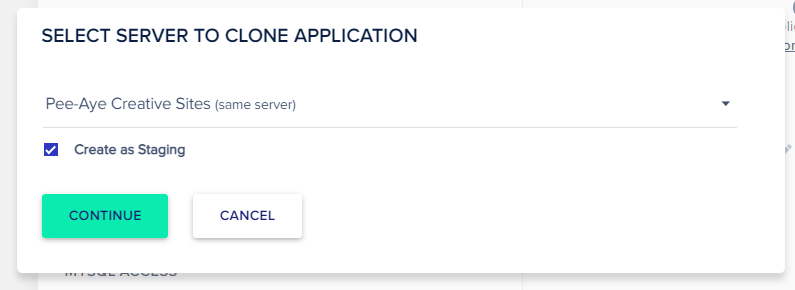
From the dropdown, you can choose your server. Then mark the checkbox next to “Create as Staging” and click the green “Continue” button.
The system will now create the staging copy, and once it is done processing it will be added to your list of applications that can be accessed by clicking the www menu. It will have a “Staging” tag next to the name.
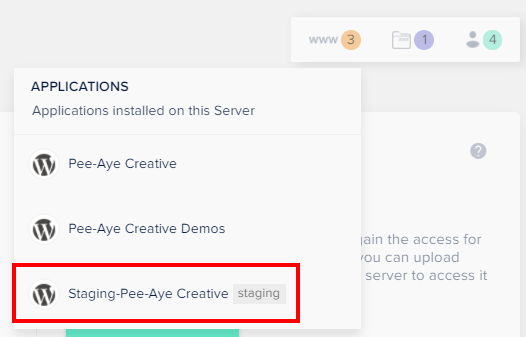
Edit Your Staging Website
Now that you have made a copy of the site, you can go ahead and make the changes on the staging site. So this is when you can test your code, update the Divi theme, update plugins, etc.
You can access the WordPress staging site by clicking the Access Details in the left menu. This works just like your live site access details.
Pull The Changes To The Live Site
Once you are done making changes or updates to your staging copy, and you have checked your site and are happy with the result, you can proceed with pulling the staging site to live, which will update your changes made on the staging site to the live site. To do this, click the menu to reveal the available staging site options that Siteground provides.
Be sure to read the labels carefully. Push and pull terminology can feel confusing, but just read the description and double check it each time.
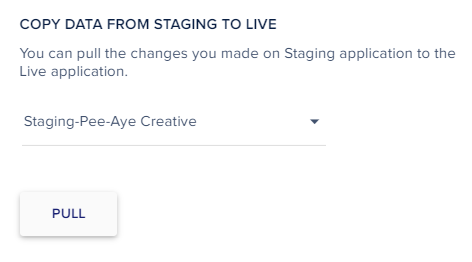
This will bring up a dialog box with several options. Please see the detailed notes in the Cloudways documentation staging guide about this. This is very important!
Method #2: Setting Up Staging Using A Plugin
Setting up a staging site using a plugin is as simple as setting up the staging site with the host. There are many plugins that can be used to make a clone, duplicate, or staging site. Just go to the WordPress plugin repository and do a search, and you will see what I mean.
One of the options that will probably come up first is called WP Staging. And of course with a great name like that, it is bound to be good. I never used it (all my hosts have a staging feature), but from what I understand it is a very good plugin for creating a staging site. With just one click, it copies the live site into a new subfolder on your hosting server.
Be sure to note that most of the free staging plugins will not have any feature to move the staging to live, but only live to staging. This may or may not be a dealbreaker for you. So essentially this method allows you to copy the site, test your changes, and then if everything is fine you can replicate those same exact steps on the live site, and it should be the same result.






If using the WP Staging plugin you can always go to the Tools menu in the site’s backend and Export the staging site when you’re finished with it and Import it into the Production/Live site.
Oh okay, great to know, thanks for sharing!
I have siteground, and had, prior to divi, made my divi site custom categories pages by making a category. php, and since the theme builder and the latest speed core related updates, I thought it high time I removed the category php file, and made the category pages with the theme builder.
I did this on the staging site in about 5 minutes, and it was all easy enough.
I did a full deploy, and none of the new theme builder templates I had just made deployed with the staged site to the live site.
Luckily this was so quick to do that I just took five minutes on the live site and made the new category templates again and all the blog pages worked fine.
Are theme builder templates not supposed to deploy form staging ?
There is one other thing with Siteground which is quite confusing, which is the “Protect URL” which you are going to want to do for your staging site, and although it works fine, the siteground videos about how to do this I didn’t find helped me until I had worked out how to do it – this may just be me, but I think they could do much better documentation just on that bit.
Hey Gareth,
I understood the query but I have never witnessed that on my end while pushing staging to live or vice-versa as it is supposed to send all the templates. If you are facing such issues then I would suggest talking to the site ground people and seeing what they have to say about it.
Can I install Divi on a staging site. I’m using SiteGround. I want to use Divi’s Import/Export feature for Divi Library. I want to use Library items from one site for the site I’m building in staging. Is this clear?
You can follow this tutorial 🙂 And you can use the Divi Cloud for importing and exported if needed.