Re-Order The Blurb Module elements
Every Divi user loves the Blurb module, and for good reason! It is very versatile, and we have several Divi Blurb Module tutorials here on our blog and YouTube, but it is also limited. Some people asked to move the title above the image, but due to the structure of the module it is not possible since the et_pb_main_blurb_image and et_pb_blurb_container are sibling divs. So we need to restructure the module with a simple jQuery snippet. In this tutorial I will show you how to move the Divi blurb module title text above the image.
▶️ Please watch the video above to get all the exciting details! 👆
1. Add A Custom CSS Class To The Divi Blurb Module
The first step is to place the Divi Blurb module in your layout and add your own image, write the title text, and write the body text. After that, we can go ahead and get this thing rearranged!
Go to the Blurb module settings>Advanced tab>CSS ID & Classes toggle and add the class “pa-move-blurb-title” to the CSS Class input field. This allows us to only target this particular module with the CSS.
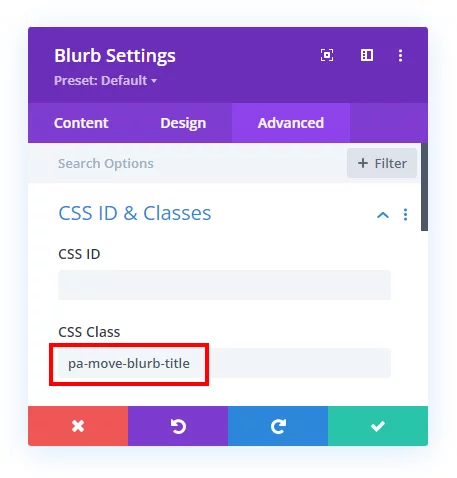
2. Add The jQuery Snippet
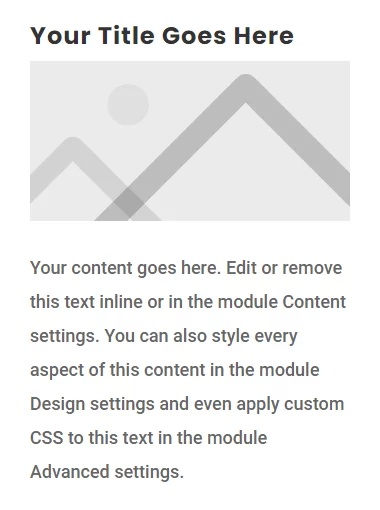
The next step is to simply copy the jQuery snippet below into your site. The code is simply prepending the header to the image, meaning it is taking the title text container and detaching it from its current place in the module and attaching it before the image.
If you are using our free Divi child theme, place this snippet into the scripts.js file and remove the <script> tags at the beginning and end. Otherwise, place this in your Divi>Theme Options>Integrations tab in the “Add code to the < head > of your blog” code area.
<script>
jQuery(document).ready(function() {
jQuery(".pa-move-blurb-title").each(function () {
 var modhead = jQuery(this).find('.et_pb_module_header')
 var modimg = jQuery(this).find('.et_pb_main_blurb_image');
      jQuery(modhead).prependTo(modimg);
});
});
</script>
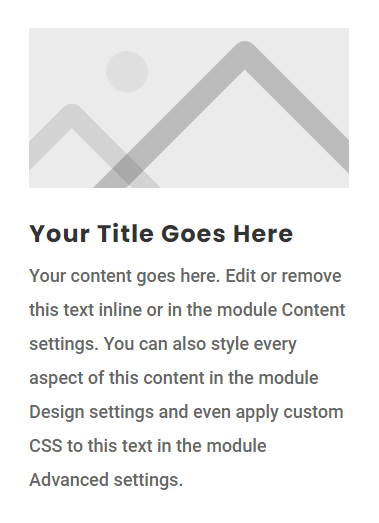
Before
After
We hope you enjoy this simple little trick!



It doesn’t work when you have multiple blurbs in the same row? I got 5 blurbs and now every blurb has 5 titles.
We have updated the code for this, sorry about that!
PayaCreative is awesome site .. I’ve search many times for DIVI problem and solutions always come on this site.
Thank you, Madu! 😉
We are glad to know that our guide helped you in some way. Stay tuned for more such guides.
I love your tutorials – but this one didn’t seem to work. I’ve refreshed the cache and still no luck…
Hmm not sure, it’s pretty basic so not sure why it wouldn’t be working.
Key step: Exit the Visual Builder 🙂
It switches back in the builder.
Hello, Nifty solution to this problem (in which I need to keep this kind of content together for a client) Question: I have to get the photo to bottom align with the very bottom of the module (I have a background color within the blurb) — I’ve removed both the padding and the margin on the the photo (via the custom CSS box) as well as all of the padding in the module, but I still have this very small gap at the bottom of the module. Any suggestions? I know you mentioned that assigning flexbox values doesn’t work to rearrange the blurb elements, but can I use it to force the photo to the bottom of the module (a la flex-end?). Any hints would be great — Thanks!
Hi Stacey!
Please add the following code in Blurb settings > Advanced > Custom CSS > Blurb content:
display: flex;
flex-direction: column-reverse;
Let me know how it goes!