Match The Divi Blog TOC
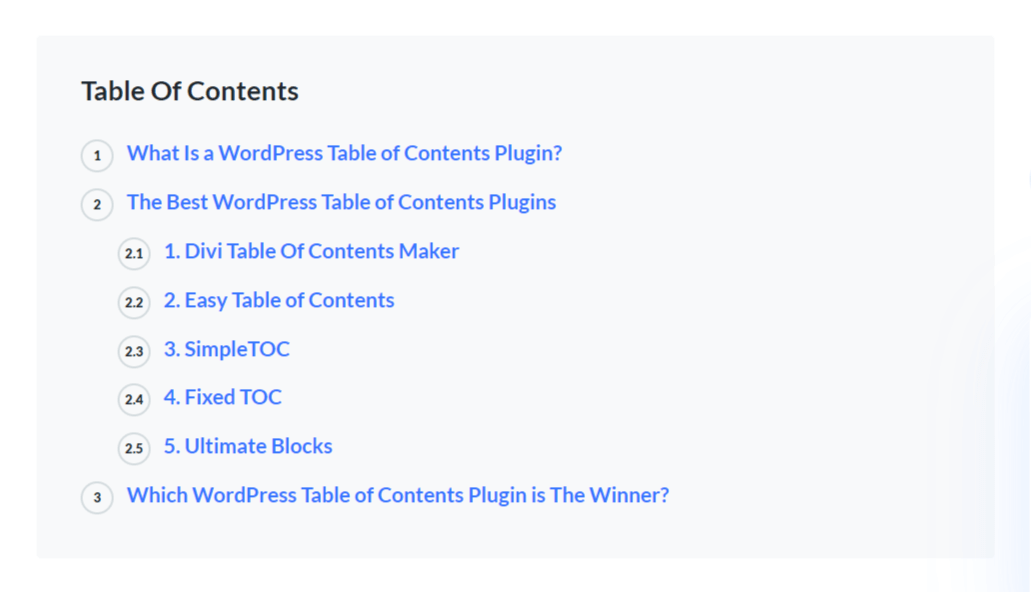
You may have noticed many popular blogs are adding table of contents to their blog posts. This includes Elegant Themes, the creators of Divi, who recently added a table of contents to their blog posts. If you want to add a table of contents to your Divi websites, then be sure to check out our Divi Table Of Contents Maker plugin. This is the only TOC module available for Divi, and has a ridiculous amount of features and design settings. In this tutorial I will show yo how to style our Divi Table Of Contents maker module exactly like the one on the Elegant Themes blog.
View Example Post On Elegant Themes Blog
(sample screenshot below)
▶️ Please watch the video above to get all the exciting details! 👆
1. Install The Divi Table Of Contents Maker Plugin
The first step before we can design the table of contents is to actually have one added to our blog posts in Divi. If you are not yet a member of our Divi Adventure Club, or have not yet purchased the individual plugin, you will need to do so first in order to access the premium plugin. So take a moment and head on over and either purchase or install the Divi Table Of Contents Maker plugin.
2. Add The Divi Table Of Contents Maker Module To Your layout
After installing the plugin, a new module will appear in the list of modules available in the Divi Builder. Simply search for the module name and add it to your layout. We highly recommend using the module in a Divi Theme Builder template for All Posts. This will automatically show the table of contents on all your blog posts. The hyperlinks will be created dynamically for each post automatically.
3. Adjust The TOC Module Settings
In order to replicate this exactly, I will give you every setting to adjust in the module. NOTE: We will be starting with a fresh module with no design settings, or after resetting the module styles. I’ll mention the setting toggle name followed by the setting name and value.
If you want the shortcut, you can download the module here. You will need to import this to your Divi Library, then add to your layout from there. (It is a .zip file since I cannot share a json, so just unzip it first.)
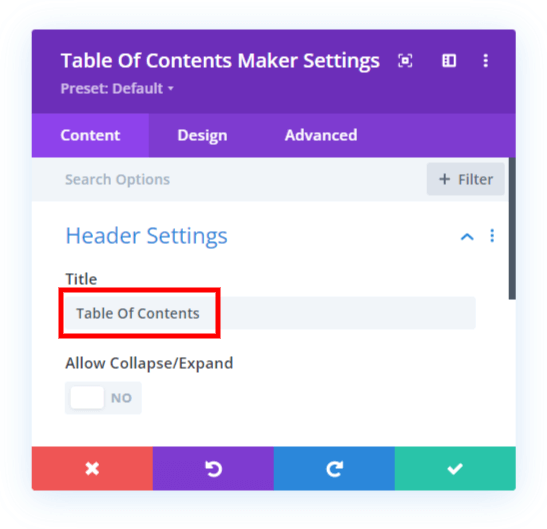
Header Settings
In the Title field I rewrote “Table Of Contents” in order to get the capitalized O to match the Elegant Themes blog exactly.
Heading Level Settings
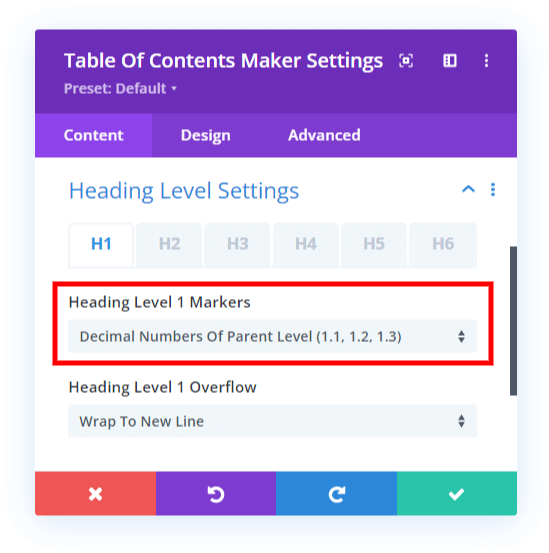
Change the Heading Level 1 Markers and Heading Level 2 Markers both to “Decimal Numbers Of Parent Level (1.1, 1.2, 1.3)” using the dropdown selector. (You may wonder why we are setting this for the level 1, but it is a technical reason related to the :marker and :before methods of adding the number in the code.)
Header
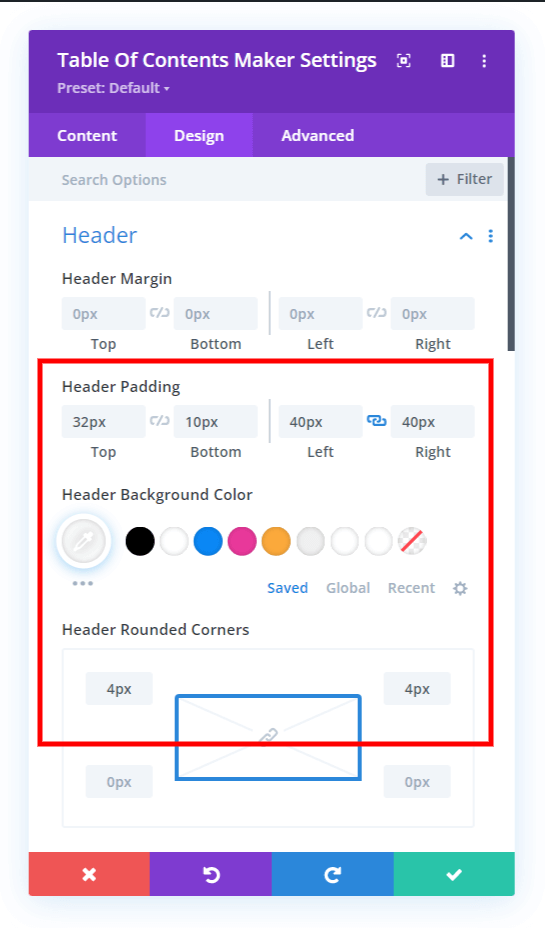
In the Design tab, set the Header Padding to 32px top, 40px left and right, and 10px bottom.
Set the Header Background Color to #f8f9fa
Set the Header Rounded Corners to 4px for the top left and top right.
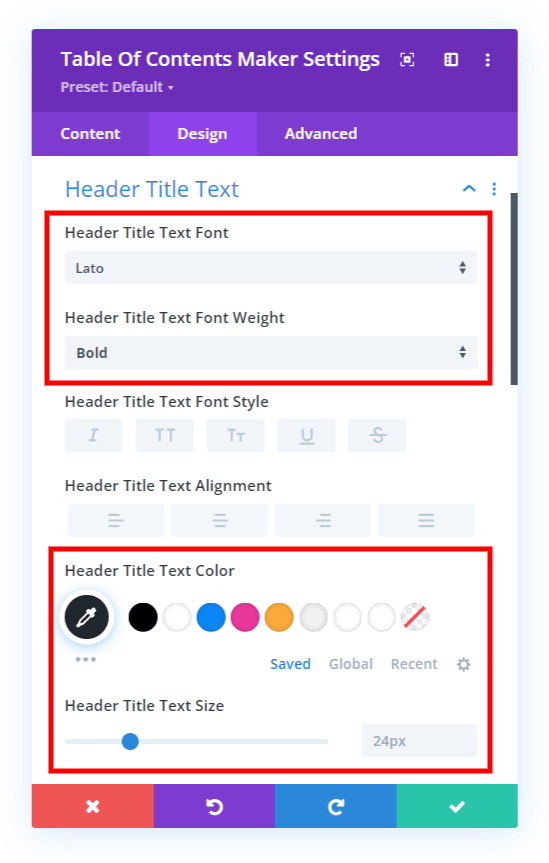
Header Title Text
Set the Header Title Text Font to Lato.
Set the Header Title Text Font Weight to Bold.
Set the Header Title Text Color to #20292f.
The default 24px is already perfect for the Header Title Text Size.
Content
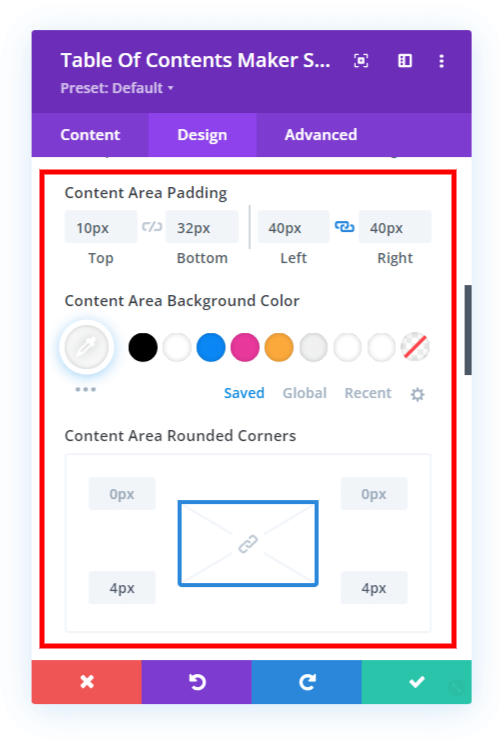
NOTE: You may need to set the Content Max Height to any arbitrary high number since the TOC on the Elegant Themes blog does not use a max height or scrollbar.
Set the Content Area Padding to 10px top, 32px bottom, and 40px left and right.
Set the Content Area Background Color to #f8f9fa.
Set the Content Area Rounded Corners to 4px on the bottom left and bottom right.
Content Heading Links
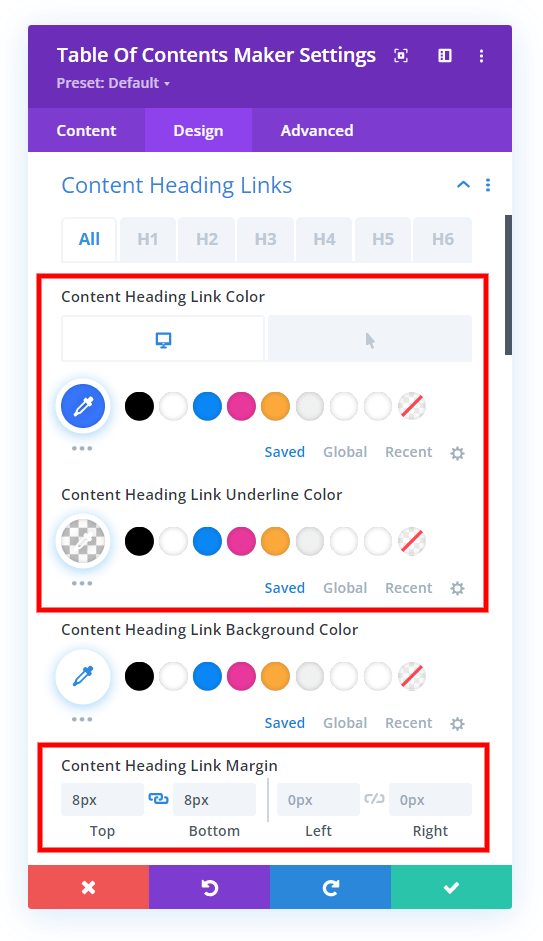
Set the Content Heading Link Color to #3776ff.
Since the links in the table of contents on the Elegant Themes blog do not have any hover effect, we need to enable the hover tab to activate the same blue color for default and hover.
Set the Content Heading Link Underline Color to transparent.
Set the Content Heading Link Margin to 8px top and bottom.
Content Heading Markers
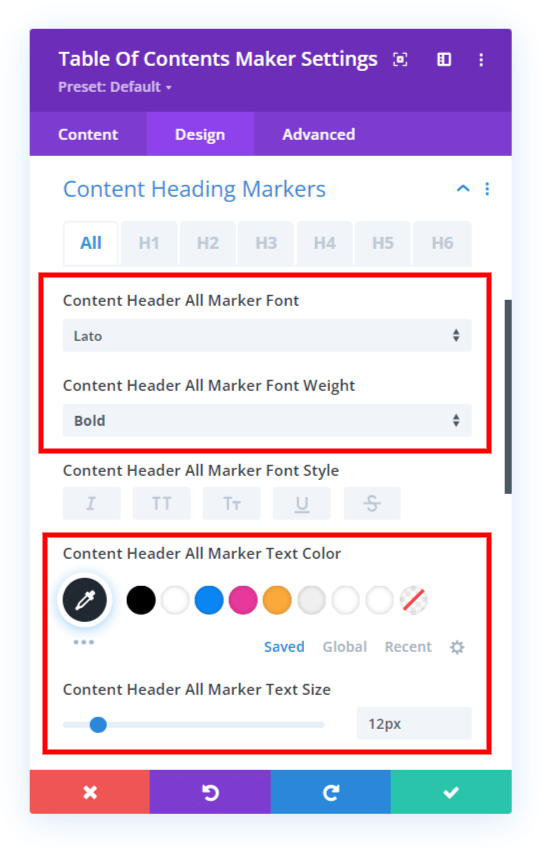
Set the Content Header All Marker Font to Lato.
Set the Content Header All Marker Font Weight to Bold.
Set the Content Header All marker Text Color to #212b33.
Set the Content Header All Marker Text Size to 12px.
4. Add Some CSS For the Markers
We are not quite able to match the marker numbers styling in the current version of the plugin. To continue with our perfect match of the table of contents on the Elegant Themes, we will need to add some CSS to make the gray circle around the number.
If you are using our free Divi child theme, place this snippet into the style.css file. Otherwise, place this in your Divi>Theme Options>Custom CSS code box. If you need help, check out our complete guide on Where To Add Custom Code In Divi.
/*style the Divi Table Of Content Maker module markers*/
.pac_divi_table_of_contents ul>li:before {
	font-weight: 800;
	border: 2px solid #D4DBDE;
	border-radius: 50%;
	padding: 2px;
	width: 2em;
	height: 2em;
	text-align: center;
}
After adding the CSS, your table of contents should look exactly like the one on the Elegant Themes blog. Enjoy!



0 Comments