Related Posts…In A Carousel!
When reading a blog post, it is nice to give the reader some related articles at the end of the post so they can continue reading and remain on your site longer. Often this can be achieved by displaying 2 or 3 related posts. But what if those are not enough? Here is a great solution and a very nice addition to any blog – related posts in a carousel. Whether you are already showing related posts on your Divi blog posts, or have not yet added them, this tutorial will help you add some fun interaction to your posts. This tutorial will show you how to display a carousel of related blog posts in Divi.
▶️ Please watch the video above to get all the exciting details! 👆
Prerequisites
Have Some Blog Posts
Naturally, the first step before you can create a related blog post carousel is to actually have some existing blog posts in WordPress. Most likely you already have some blog posts and can keep going, but if not you can add some sample ones for the tutorial.
Use Categories For Blog Posts
In order to show “related” posts, they must actually be related in some way. In our case, they will be related by category. Because of this, each post on your site will need to be assigned to at least one category so that we can show other posts within the same category.
Have A Theme Builder Template For Blog Posts
You will need to be using a dynamic blog post Theme Builder template in order for this tutorial to work. Usually you would have a Post Content module in your template, and we will be placing a Blog module somewhere below that post content.
Install The Divi Carousel Maker Plugin
In order to make a carousel, we need a carousel maker! And of course we have one for you, a plugin designed by yours truly called the Divi Carousel Maker. Basically this plugin creates a carousel from your existing Divi modules, so it’s pretty unique and clever. If you are not yet a member of our Divi Adventure Club, or have not yet purchased the individual plugin, you will need to do so first in order to access the premium plugin. So take a moment and head on over and purchase or install the Divi Carousel Maker plugin.
1. Add The Blog Module To Your Layout
Open the theme builder template that is assigned to your blog posts. Choose where you want the related blog post carousel to be placed within your layout. You can use an existing section or row, or add a new one.
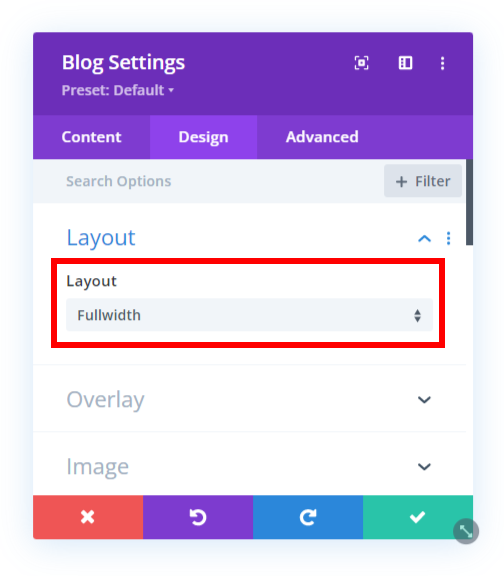
Add a Blog module to your layout. Open the Blog module settings and go to the Design tab to the Layout toggle. Make sure the layout is set to Fullwidth (which is set by default) because this tutorial will not work if you change it to Grid layout.
2. Set The Post Count To 1
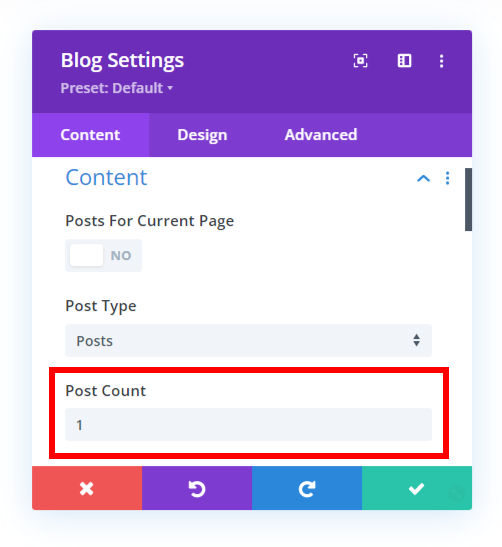
Inside the Blog module settings, there is an option to set the post count. We need to set the post count to 1 in order to show a single post. This may seem strange, but it will make more sense later.
3. Select The Current Category
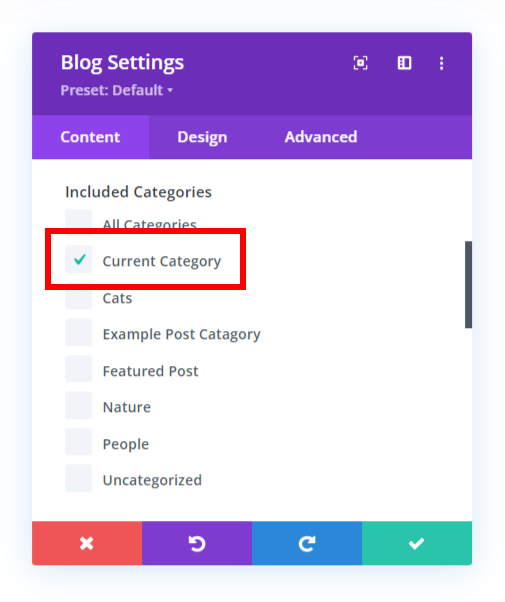
Next, find the Included Categories checkboxes inside the Blog module settings. Here you need to select the option for Current Category. This setting means the module will only show posts that are within the same category as the post the visitor is currently viewing. In this sense, the posts that show will be “related” to the current one.
4. Duplicate The Module And Adjust The Post Offset Number
In the previous step, we set the Post Count to 1, so now we need to duplicate the Blog module (i.e. that single post) multiple times. The total number of duplicates is up to you, and this depends on how many related posts you want to show. If you are showing 3 posts at a time in the carousel, then you will need at least 4 posts/modules to make it into a carousel.
5. Adjust The Post Offset Number
Now you should have a list of Blog modules each set to fullwidth showing only one post. But they are all showing the same post. To change that, we need to adjust the Post Offset Number in each of the duplicated.
The offset feature allows us to skip posts that show in the module. You can learn more about this feature in our separate tutorial: How To Use The Divi Blog Post Offset Number Feature.
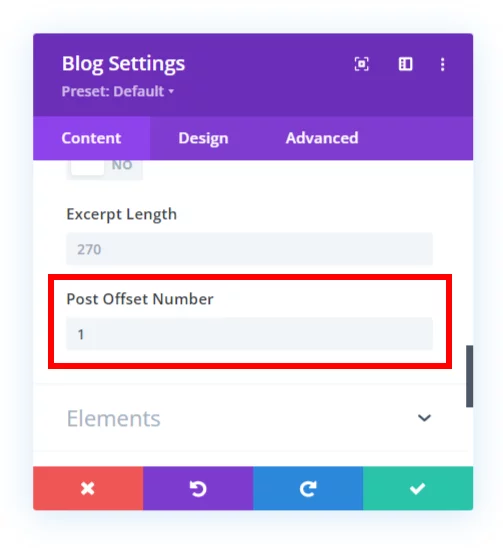
The first Blog module is fine, you don’t need to add any offset. But each of the other modules needs to have an offset number assigned. Here is the pattern that you need to follow for it all to work correctly:
- Blog module 1 = Post Offset Number 0
- Blog module 2 = Post Offset Number 1
- Blog module 3 = Post Offset Number 2
- Blog module 4 = Post Offset Number 3
- Blog module 5 = Post Offset Number 4
- Blog module 6 = Post Offset Number 5
That same pattern would always continue if more posts are needed. The second module with an offset of 1 will skip the first item, and that’s great because the first module already shows that post. The third module with an offset of 2 will skip the first 2 posts, and that’s great because the first two modules already show those. You get the idea. The offset number is the number of posts that are skipped.
6. Enable The Carousel
At this point you should have your modules set up and designed and are ready to turn them into a carousel. To create a carousel, first go into the Row settings where the Blog modules are located and then into the Column settings. There you will see a new fourth tab called “Carousel” which is added by our Divi Carousel Maker plugin. Inside that tab, you will see a toggle called “Carousel Settings.” Click to open this toggle, and then you will see the setting called “Make This Column A Carousel.”

Enabling this setting is what creates a carousel on the frontend (it will not show in the Visual Builder) of the Blog modules. Now anyone who is reading your blog post can scroll through a carousel of related blog posts!






0 Comments