ACF Free + Divi Gallery = awesome
Today I am doing something unusual for the first time, out of necessity. I am doing a tutorial that requires a paid product. I have never done this before, and do not intend to make a habit of it, but I simply couldn’t just avoid sharing a solution simply because it costs some money, because it is quite frankly the only way to do it, and it is really awesome! So in this tutorial, I will show you how to use the free version of the Advanced Custom Fields (ACF) plugin to dynamically show images in the Divi Gallery module! This is the only solution on the market for making a gallery with ACF free version and Divi. The long-awaited solution is unique and innovative and solves a major problem for Divi users.
▶️ Please watch the video above to get all the exciting details! 👆
THEME BUILDER: It is worth reminding you that dynamic content is often meant to be used in a template created with the Divi Theme Builder. We recommend using the Theme Builder for creating dynamic galleries. If you are not familiar with the Theme Builder, please check out our Divi Theme Builder mini course.
1. Install Necessary Plugins
Install And Activate Advanced Custom Fields
To start, install and activate the Advanced Custom Fields plugin. You can find this for free in the WordPress repository, so in your site, just go to Plugins>Add New and search for it.
Install And Activate Divi Dynamic Helper
If you have not seen our exciting new Divi Dynamic Helper plugin, please go take a look! You will need this in order to create a gallery using ACF and the Divi Gallery module.
Once you purchase the plugin, go to your account and download the plugin zip file. Then go to your WordPress site, Plugins>Add New>Upload. Select the plugin and install and activate it.
2. Create An ACF Field Group
After the plugins are installed, you will see a new menu item on the left side called Custom Fields. Click on that to begin.
The first step to use ACF is to create a field group, which is just the name for a specific set of custom fields. Click the Add New button and name it whatever you prefer.
Set Location
Now you need to assign this Field Group to a page, post, post type, etc. There are many options to choose from here, it is a really great system, and you can add various conditions to narrow it down exactly how you want. So just think about where you need the image gallery, and choose accordingly.

3. Add ACF Image Fields
Next, you need to add the custom fields. Since we are creating an image gallery, we will need to add image picker fields. Fields can be added by clicking the +Add Field button.

Add A Group Field Type
But first, we need to do one more important step. Instead of just adding a lot of image fields, we first need to create a group for them.
Add a new field and write a custom Field Label. This is the admin name of the field which will be shown to users in the backend on posts/pages, so it should be something descriptive of the image gallery and easily recognizable.
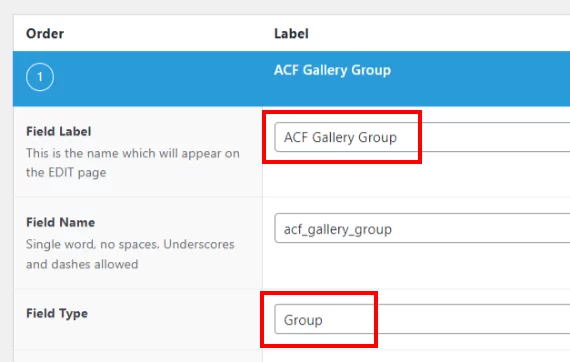
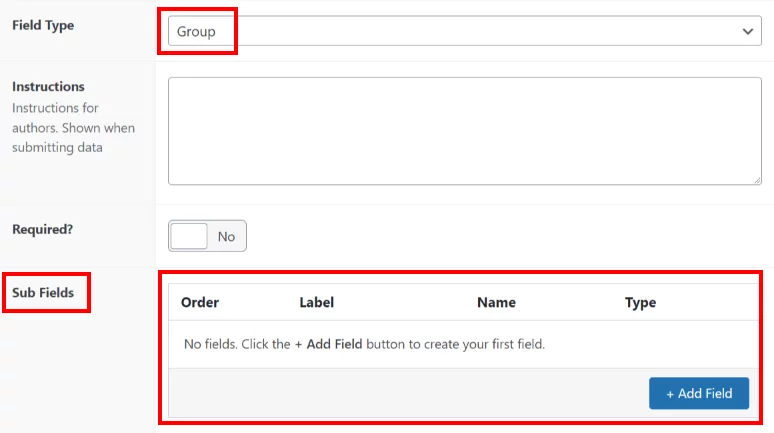
Next, set the Field Type to Group. This is important. This serves both a practical organizational purpose, but also a technical requirement. In the next step, we will be adding individual image fields to this group.
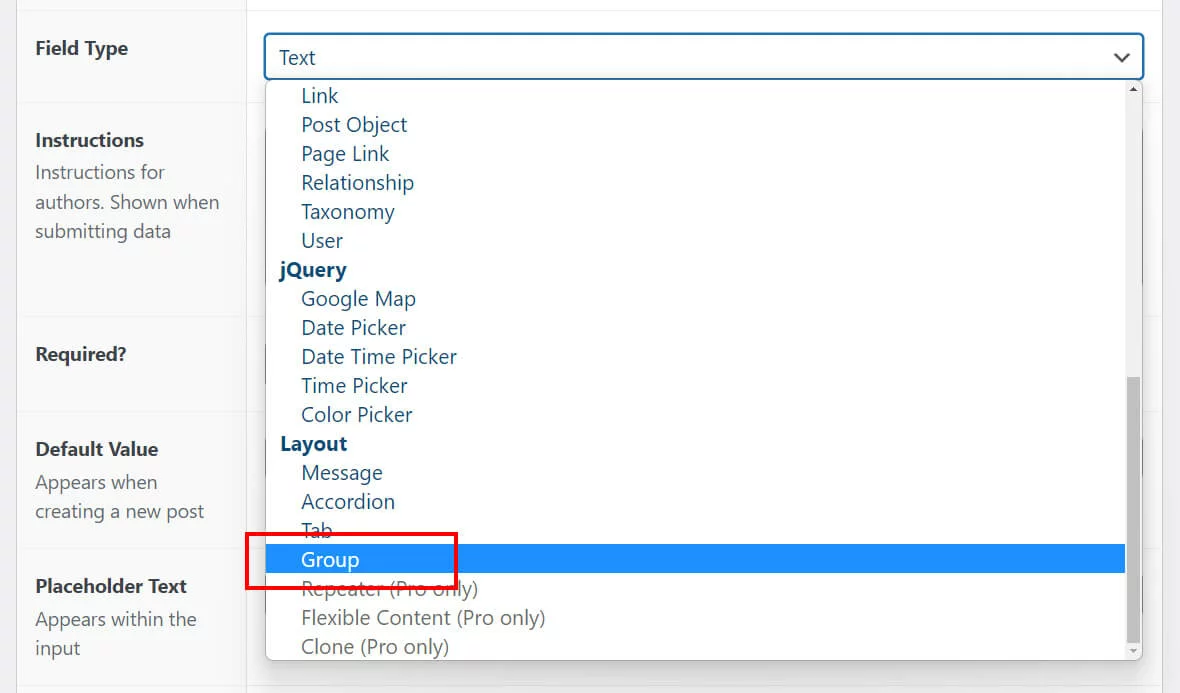
This is important. This serves both a practical organizational purpose, but also a technical requirement. In the next step, we will be adding individual image fields to this group.
Add Image Fields To Group
Notice the group field now contains its own Sub Fields area to add new fields.
Within the Sub Fields, click on + Add Field.
Write Image 1 in the Field Label.
Set the Field Type to Image
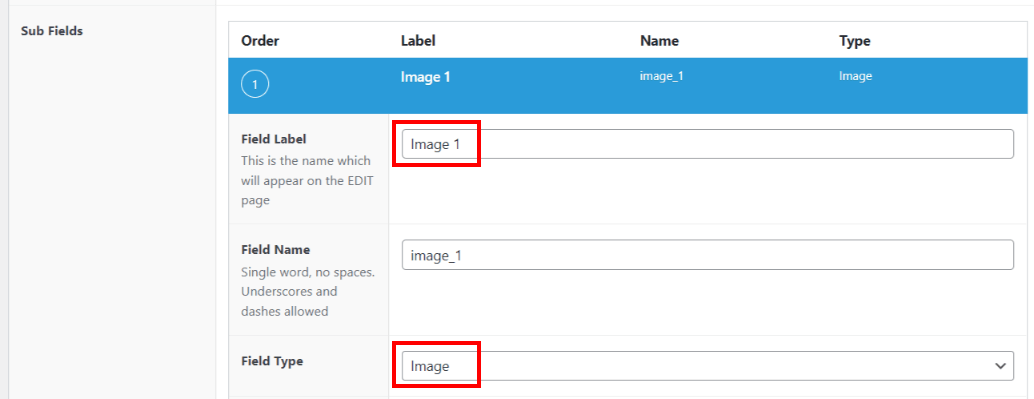
Repeat – Add More Image Fields To Group
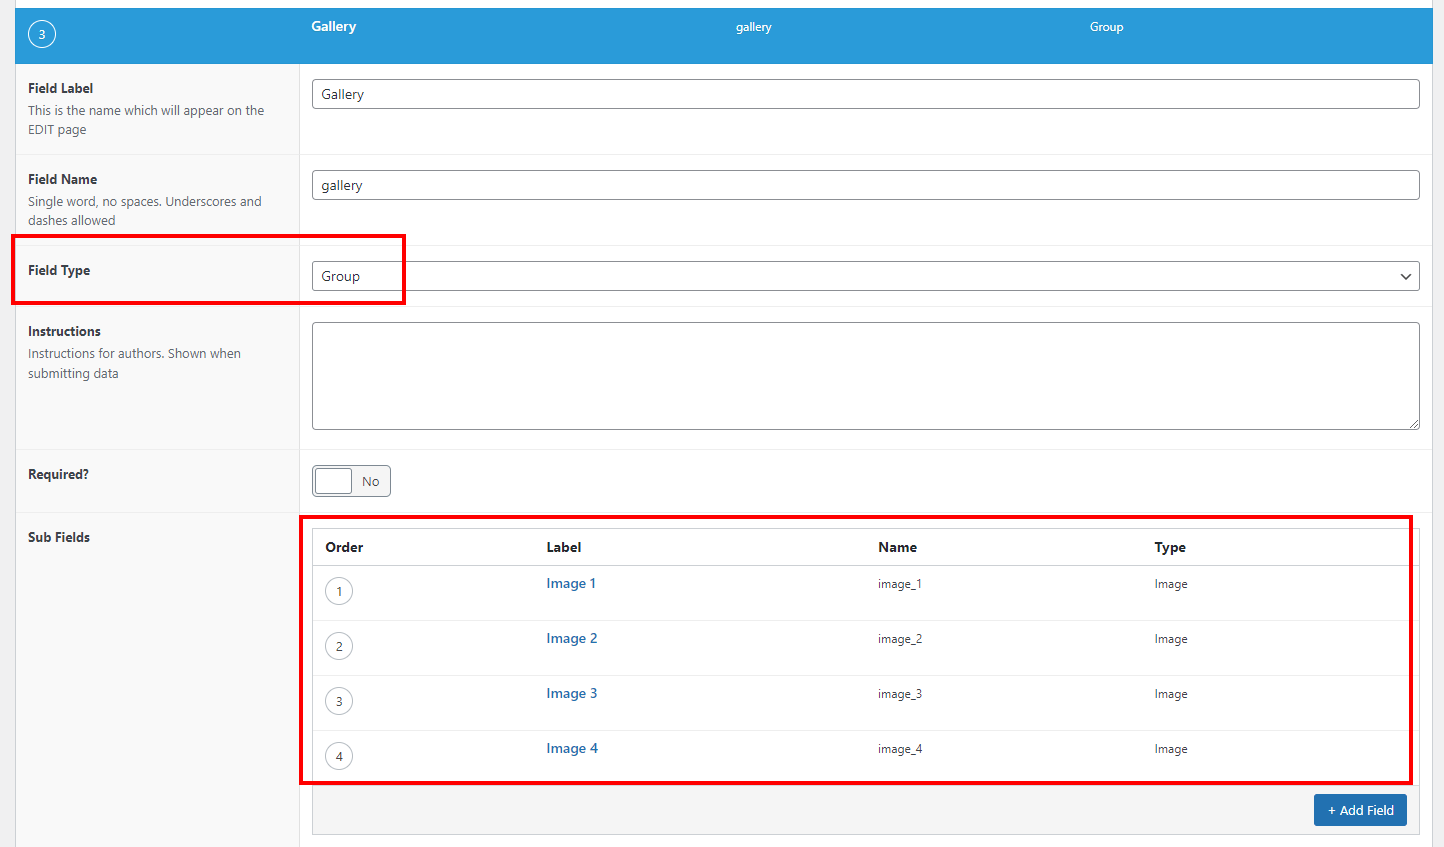
Now you should repeat this step and add more image fields. Just name each one Image 1, Image 2, Image 3, etc. You can add as many Image fields as you want.
How to decide how many fields to add? First, consider the maximum number of images that would be required in any of the galleries on your site. Then add at least as many image fields to the group. Later, when a user selects the images for a gallery, it is not required to fill each image field. It is totally fine to leave fields blank. For example, if you add 20 fields, but on one page the user only selects 12 images, then only those 12 images will show in the Gallery module and the empty fields are not used.
After adding more image fields to the group, it will look something like this:
Now you are finished setting up the custom fields. You can now go to the page or post where you assigned the Field Group location in step #2.
4. Add Images To Page/Post
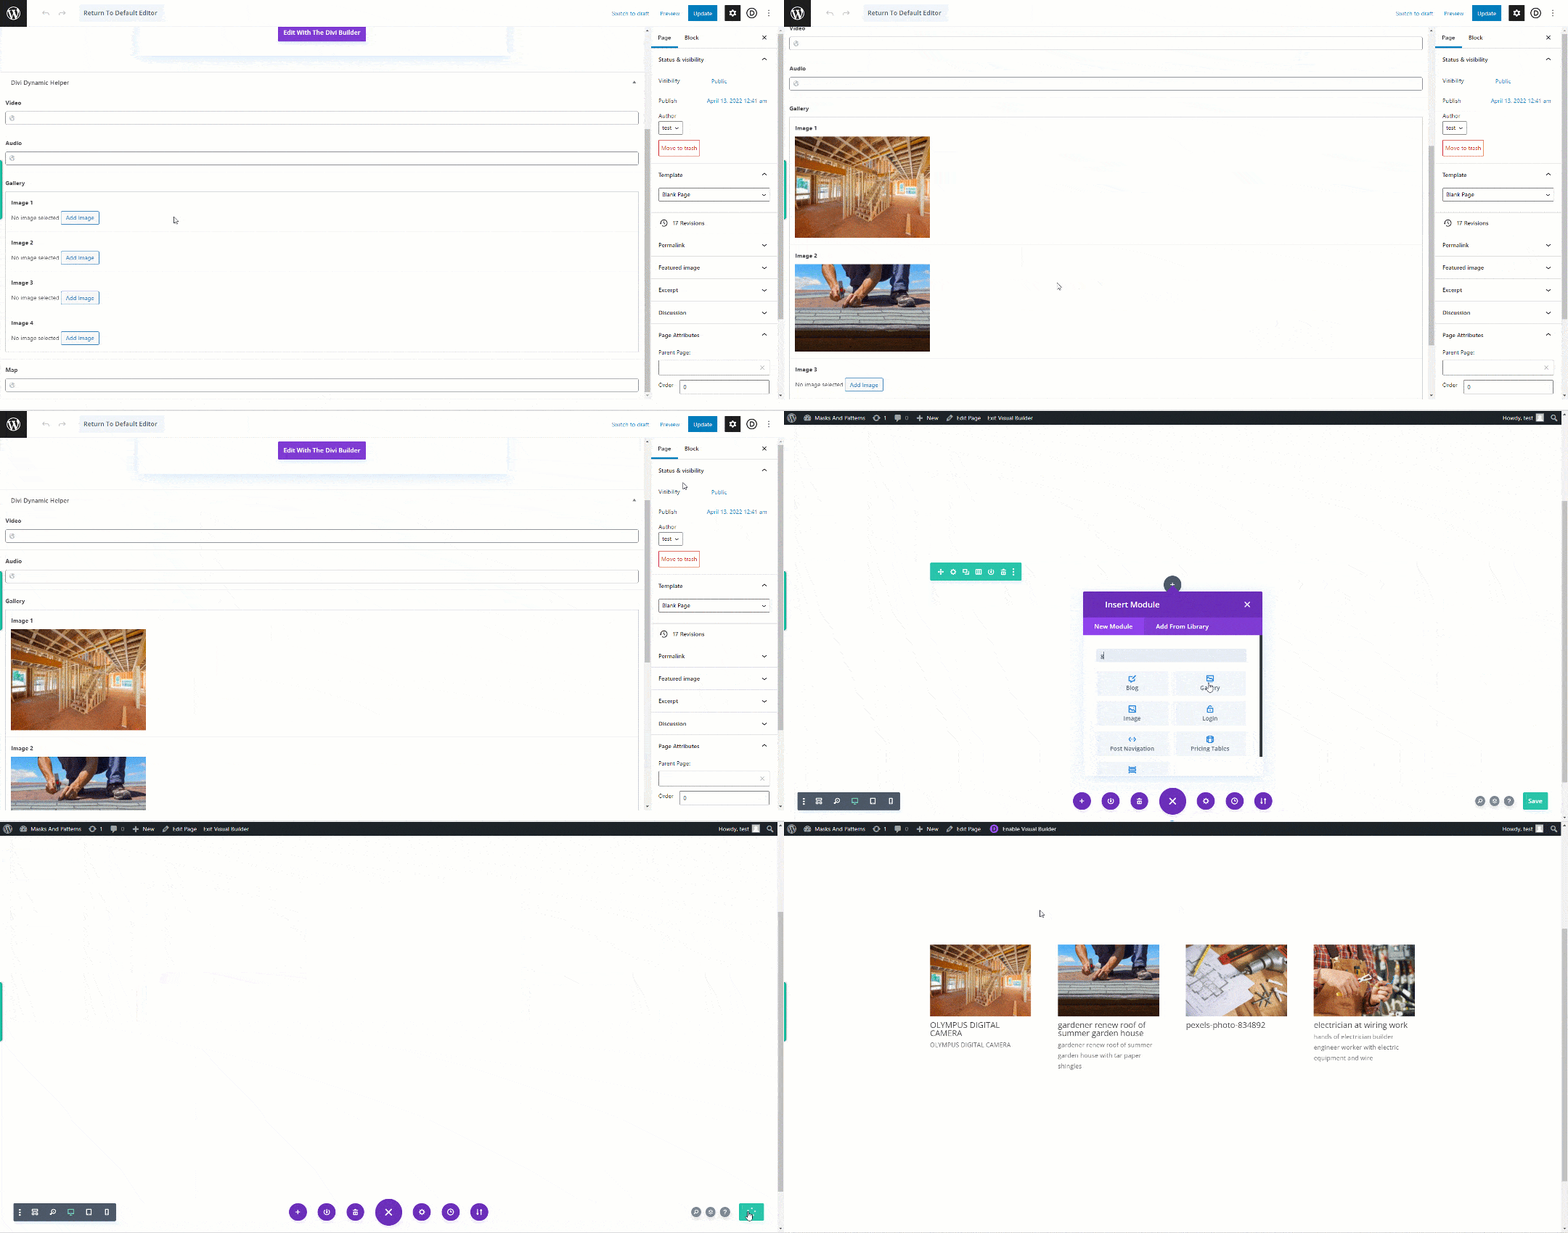
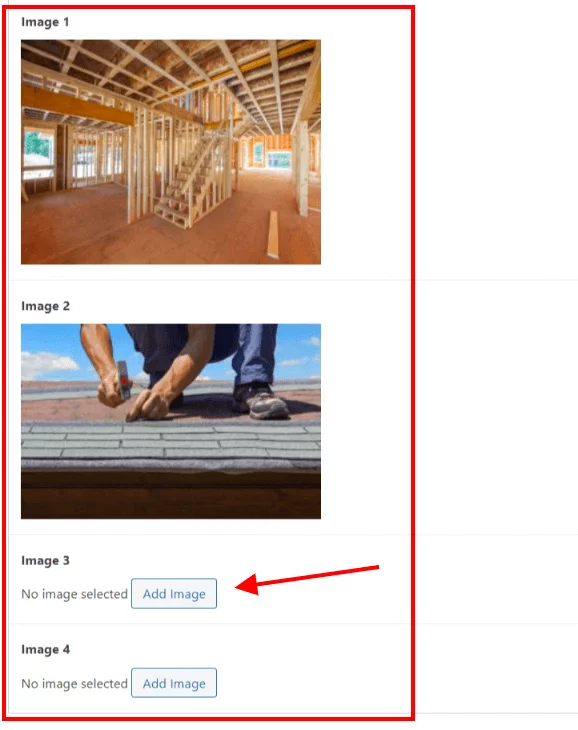
Once the custom fields are all set up in Advanced Custom Fields, and the Field Group is assigned to a location, you can go to the page or post and add images using the convenient file picker. Just click the Add Image button on each field!
Clicking the Add Image button opens the WordPress Media Library where you can select an image that is already uploaded or upload a new image. The GIF below shows the process of selecting images in step #4, as well as adding the module and connecting to the fields with dynamic content in step #5.
5. Connect The Divi Gallery Module To The Custom Fields
Add/Open The Gallery Module
The last main step is to add the Divi Gallery module to your layout and connect it to the custom fields. If you do not have a Gallery module in your layout yet, go to your Visual Builder and click the gray plus (+) icon to add a new module and select the Gallery module. If you already have a Gallery module in your layout, be sure to remove any existing images from the Content tab>Images toggle>Images field.
Click The Dynamic Icon Button
After adding a new Gallery module or removing any existing images from an existing Gallery module, you will see the new dynamic content icon in the upper right corner of the Images field.
NOTE: This icon only appears when the Divi Dynamic Helper plugin is active.
Select The Custom Field
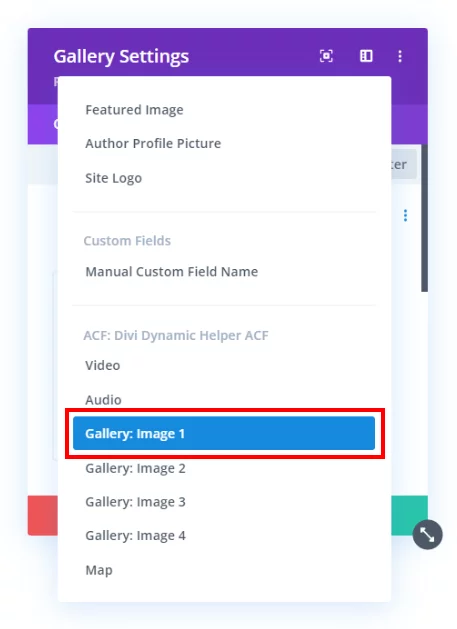
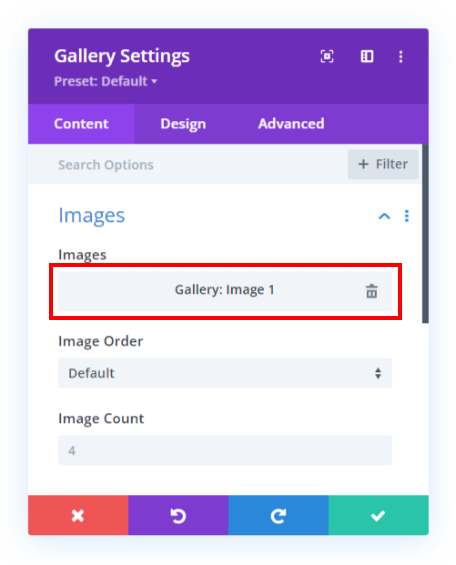
When you click the dynamic content icon, a new window will appear with a list of all the available custom fields on the site. You can now select any image from the group, and this will automatically load all the other images into the gallery.
NOTE: If you select a custom field from the list that is empty, no images will show in the gallery. Because of this, we recommend always selecting the first image in the group as the connected custom field, since most likely the first field would always contain an image.
The screenshot below shows how it will look when selecting the field (the custom field name will depend on whatever you have set in ACF).
The screenshot below shows how it will look after selecting the field.
Save The Module Settings
You are finished with the setup! Be sure to save the module settings, and when you exit the builder, you will see the Divi Gallery module contains the images from the custom fields and can be viewed like usual.
Everything else about the Gallery module can be adjusted according to your preference and will work just like normal.








Will this work with ACF Pro’s gallery module? With this I can add images to a custom field in the events calendar and then using your divi events module I can display a unique gallery for each event and the user can simply add images when adding an event rather than using image ID’s
Not at this time, no. We are getting several requests for this, so we will check if this is possible to add.
I love the plugin and all those that can connect to ACF. It would be great to be able to connect the “Gallery” data type that ACF Pro has. It would be really awesome.
We will check this and add if possible, but keep in mind our plugin is Divi Dynamic Helper, not Divi ACF Helper 🙂 We will try to get a copy of the pro version to check this.
Hi Nelson.
Neat solution… Will it work with the repaterfield option in ACF…?
Best,
Morten
I don’t know anything about that sorry. The plugin works as described here in the tutorial, beyond that I have not tried.
Any plans to integrate with generic Gallery fields in 3rd party modules, e.g. Divi Supreme?
No we would not integrate with any 3rd party plugins like that.
Hi there, great solution that works for my clients website. Only one thing… if no images are selected the gallery displays default 5 other images, not related to the post. Any idea how to solve this?
I think in this case the gallery should hide, is that right? We can add this feature.
Hi Nelson,
We need the same feature that if no images are selected random ones are not shown. tried to apply conditional logic but that only appears to work for manual custom fields. Any idea when this will be added?
EDIT: Ah, found the solution using conditional logic just use the ‘Manual Custom Field Name’ and set it to show if ‘acf_gallery_group_image_1’ ‘Is Any Value’
Yes you got it, glad you found it!
Hello, will this work with ACF Pro’s gallery module?
Yes, please check our version 1.1 update where we added support for that.
HI Nelson – Great tutorial.
I tried this, but it only loads one image instead of the 6 loaded (Divi Dynamic Helper installed). Is there perhaps something we are missing? We are building a detail layout page for a listings website.
Thanks
Hi Gavin,
I am not sure without more context. If you mean there is some issue with the plugin, please be sure to reach out to our support!
Thanks Nelson – I’ll log a ticket for better insight
much appreciated