Category Featured Images
You are probably all familiar with adding a featured image and excerpt to a WordPress page or blog post. But did you know this is not possible with category or tag pages? This is a feature WordPress does not include, and as Divi users it, it feels sad because of the potential of the amazing Divi Theme Builder. Imagine if you could dynamically add an image for category and tag templates, it would really help spruce up the pages! Now you can, and in this tutorial I am going to show you how to add a category image and description in Divi.
▶️ Please watch the video above to get all the exciting details! 👆
1. Install The Divi Taxonomy Helper Plugin
Not Available By Default
Since this is not a feature that comes in WordPress or Divi by default, we first need to get this functionality. You may be tempted to try a few free plugins in the WordPress repository to add an image to a category, but none of them will do the most important feature of actually making this image usable.
The Only Solution For Divi
The only solution to dynamically add a category featured image to a Divi Theme Builder category template is with our plugin Divi Taxonomy Helper.
Perhaps you are not familiar with it, or even with taxonomies, and that’s okay. It’s a very simple plugin to learn, and very affordable. A taxonomy is just a fancy term for something like a category or tag. We noticed this feature was missing, and the need to enhance category pages, so we created this plugin as the only solution available for Divi users. If you are a member of our Divi Adventure Club, simply go to your account and download the plugin and install it on your site. Otherwise, you can purchase the plugin to proceed with the same steps.
2. Add Featured Images To Categories
After the plugin is installed, go to the WordPress Dashboard and hover over the Posts menu on the left side and click on Categories.
This brings you to a list of all the blog post Categories on your site. If you don’t have any categories added, you can create them, otherwise we will be editing the already existing categories. Click on the title or hover over the item and click the edit button to open the settings for each category.
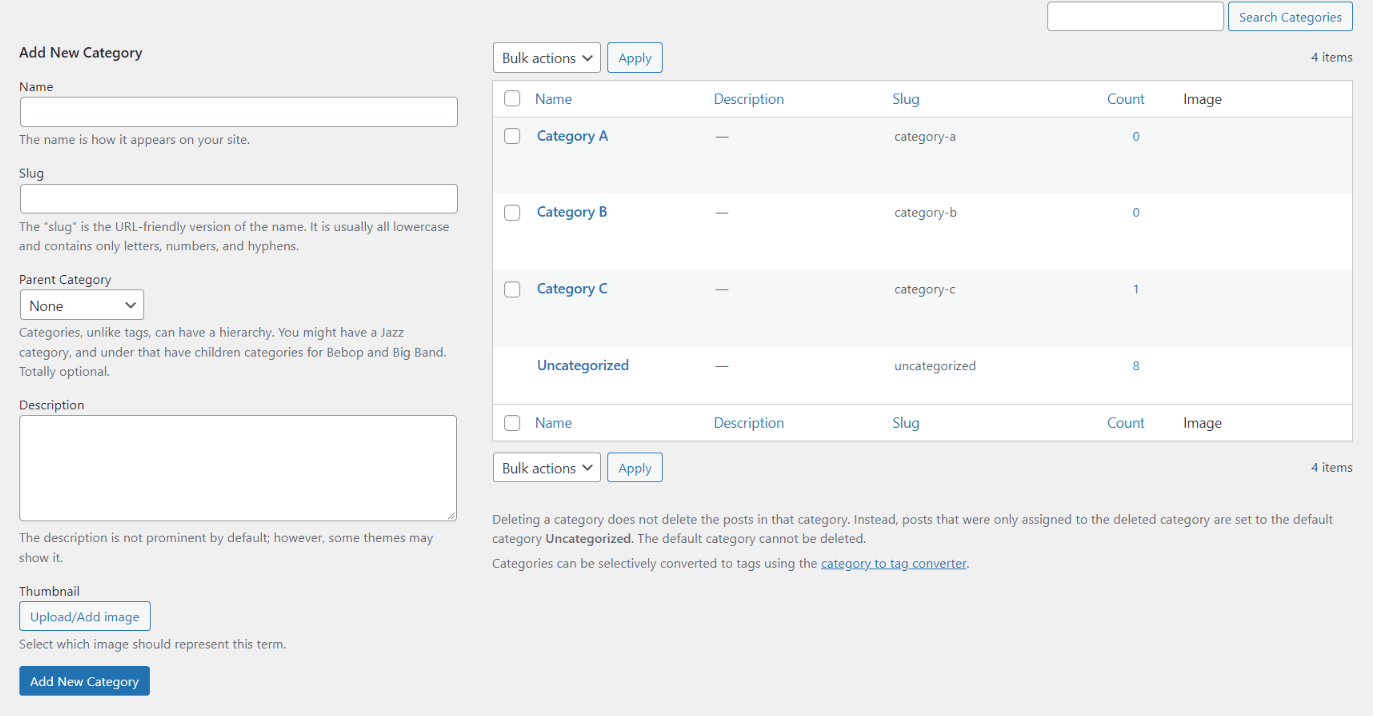
At the bottom, you will see a new Thumbnail setting has been added by our plugin. Simply click on the Upload/Add Image button, and select an image that represents that category from your Media Library or computer.
It couldn’t get much easier than that. After an image has been added, you can easily replace or remove it. To replace an image, click the Upload/Add Image button again and select your image. To remove an image, click the Remove button.
3. Add A Description To Categories
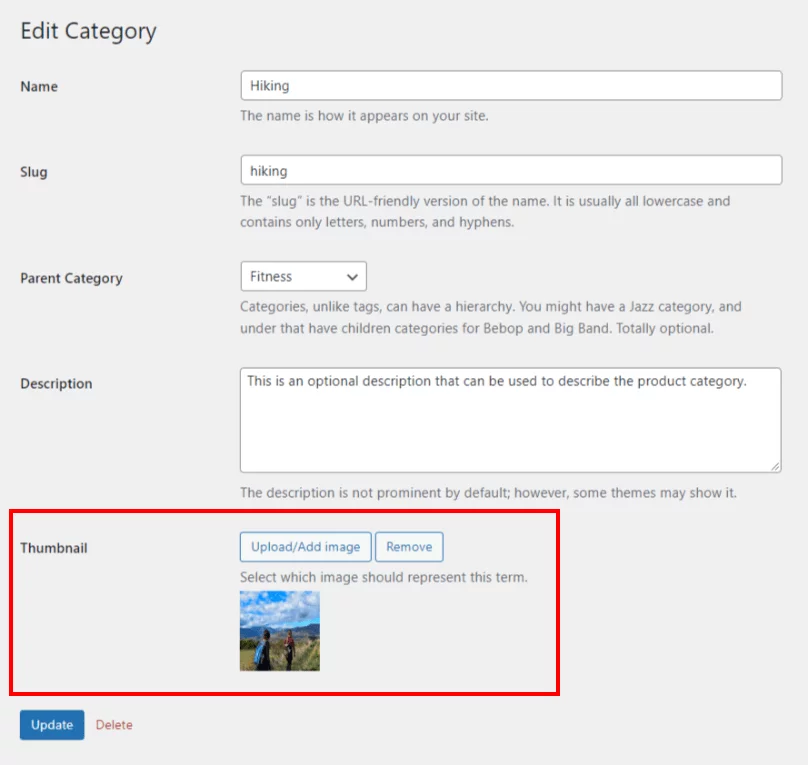
Along with the image, you can add an optional category description. The description field comes by default with WordPress, and Divi has a dynamic content option for using this in the Theme Builder templates, which is great. I recommend adding descriptions to all your taxonomies so that they can be used in the category template or in our Taxonomies module.
4. Add Category Images To The Theme Builder Template
Add Or Edit The Template
Now for the main point of this tutorial, adding the images to the Theme Builder category template. From your WordPress Dashboard, go to Divi>Theme Builder. If you already have a template set up for your blog post category template, then go ahead and edit the existing one. If not, you will need to create a new template. The important part is where the template is assigned, which needs to be the All Categories Template.
This is not a tutorial on how to use the Theme Builder, so if you are new to it, we suggest taking one of our courses – either the Divi Beginner Course or Divi Theme Builder course.
Open the Theme Builder body template to edit the layout. Here you are free to design the layout however you want, but since this is a category page, we assume you will at least want a title and a Blog module.
Add The Category Image
Now that you are editing the template, it’s time to add the category image. Now you can add the image wherever you want using these available options:
- Image module
- Post Title module
- background image of section header
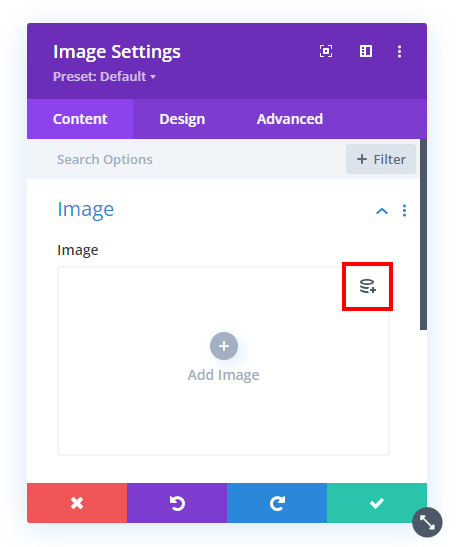
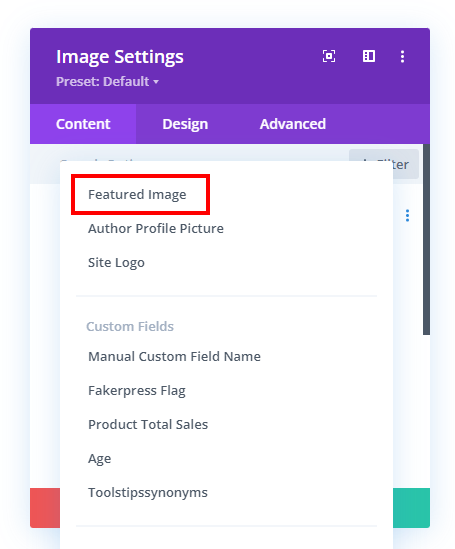
In the Image module, remove the placeholder and select the gray Dynamic Content icon in the top right corner. Then select “Featured Image” from the list of options.
For a background image, go to the section/row/module to the Background toggle and click on the Image tab, the 3rd one from the left. There, click the dynamic content icon in the top right corner and select “Featured Image” from the list of options.
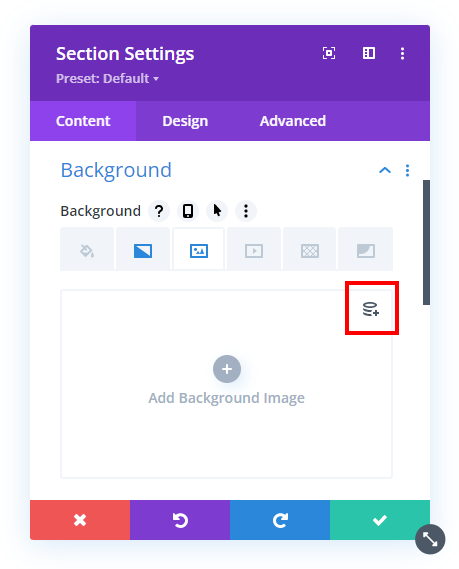
The main thing with either method is to use the dynamic content feature to load the image into the module or section background with the “Featured Image” which you need to select from the list of options. The Featured Image is the same image that you have added to the category in step #2, so wherever you place this is where that image will show.
Be sure to check the video of this tutorial to see more and to the results!









0 Comments