New Signature Field Available
We receive hundreds of feature requests for our super popular Divi Contact Form Helper plugin, and one of those has been for a digital signature field. We are pleased to announce this feature is available in version 1.6 of the plugin! This field is added to the existing Divi Contact Form module just like the other 100 features! In this tutorial, I will show you how to add a digital signature field to the Divi Contact Form module.
▶️ Please watch the video above to get all the exciting details! 👆
1. Install The Divi Contact Form Helper Plugin
The first step is to install the Divi Contact Form Helper plugin. Hopefully by now, most of my weekly blog post readers already use the plugin or are members of our all-access Divi Adventure Club, but if not, you can check it out to learn more. The plugin adds tons of settings and features directly to the existing Contact Form module, which will be used for this tutorial to add pretty much anything you want into the contact form.
1. Add A New Field And Set As Digital Signature Pad
Go to your Contact Form module, open the settings, and click to add a new field. In the Field Options toggle, keep the Type field set to Input Field, and scroll down to enable the Show As Signature Pad setting.
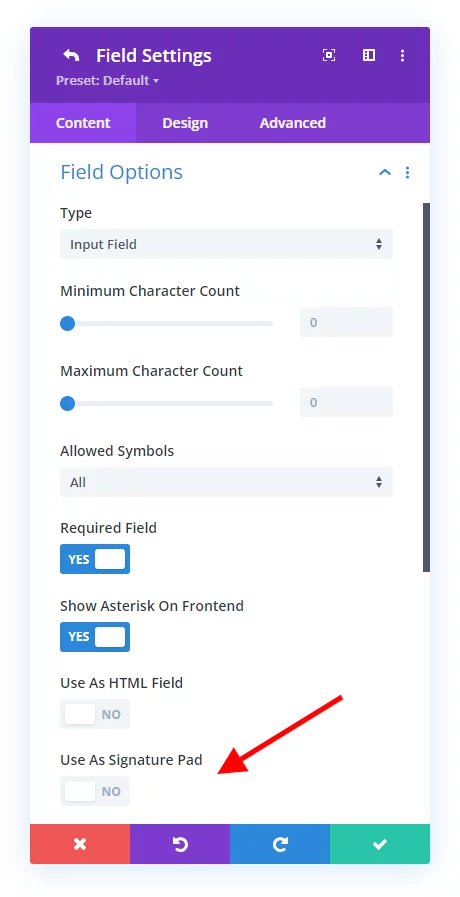
2. Add Optional Label And Description Text
Open the Text toggle of the new signature field. Here you can write some label text and enable the option to Show Label On Frontend. This is used to indicate the type of field it is for the person who is submitting the form.
As another option, you can write a field description with any instructions. This description will show above the signature field pad on the frontend.
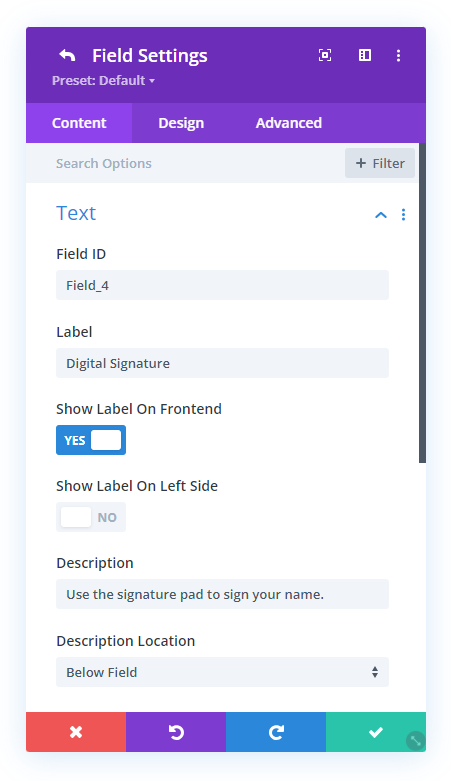
Now you can save and exit the Visual Builder in order to preview the field.
3. Preview The Digital Signature Field On The Frontend
After enabling the signature pad field and setting up the text, you can exit the Visual Builder and preview how this looks on the frontend. The screenshot below is how it should look so far by default without any design setting adjustments.

4. Adjust The Design Of The Digital Signature Field, Buttons, and Text
Now you can adjust the design however you want! As usual, we have included every design setting you could need to easily style the field, the buttons, and the text according to your branding or preferences.
To access the design settings, open the individual digital signature field settings from the Contact Form module settings. Click on the Design tab and scroll down to the Signature Pad toggle. Here you will find tabs within this toggle to adjust the pad area, the save button, the clear button, and the message text.
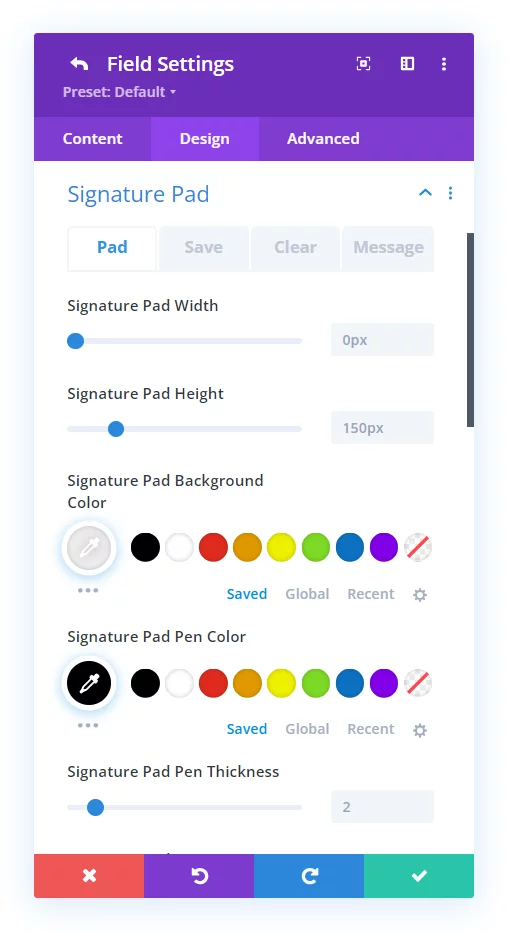
Your content goes here. Edit or remove this text inline or in the module Content settings. You can also style every aspect of this content in the module Design settings and even apply custom CSS to this text in the module Advanced settings.






0 Comments