A Great Way To Add Filters To Your Blog Posts
The Divi Blog module does not come with any filters to view posts by category. You can achieve this effect in various ways, but in this tutorial I will show you how to do it with tabs. The advantage of this method is that the posts load instantly instead of going to the actual category page. So in this tutorial will show you how to make a tabbed Divi Blog grid to quickly sort and filter posts by category.
▶️ Please watch the video above to get all the exciting details! 👆
1. Add And Design Your Divi Blog Module
The first step is something you may already have completed if you have an existing blog archive page on your site. If so, you can proceed to step 2. If you do not have a blog archive page set up yet, you can go ahead and add a Divi blog module to your page and design it however you want. This step is all about getting the design how you want it BEFORE we duplicate it, which you will learn more about later, so take your time and get it perfect. I recommend setting the Blog module to the Grid layout in the Blog module settings>Design tab>Layout toggle.
Be sure to check out all the tutorials in our Divi Blog module series!
2. Select One Specific Category In Your Divi Blog Module
For this tutorial, we will be duplicating the Divi Blog module that you added in step #1 an equal number of times to the number of tabs or categories that you want to show. For the tutorial, we will use 4 tabs/categories as the example.
For this step, click the “duplicate” icon on the Divi blog module several times. Each of these will continue to have the exact same design, but with one important setting change.
In the first module, select the checkbox for your first blog category as shown.
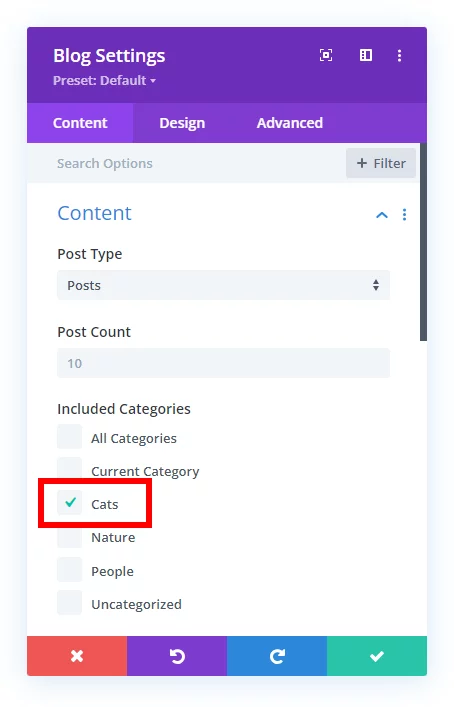
Now open the second Blog module and select the checkbox for your second blog category. Repeat this step for as many categories as you intend to show in tabs.
3. Save Each Blog Module To The Divi Library
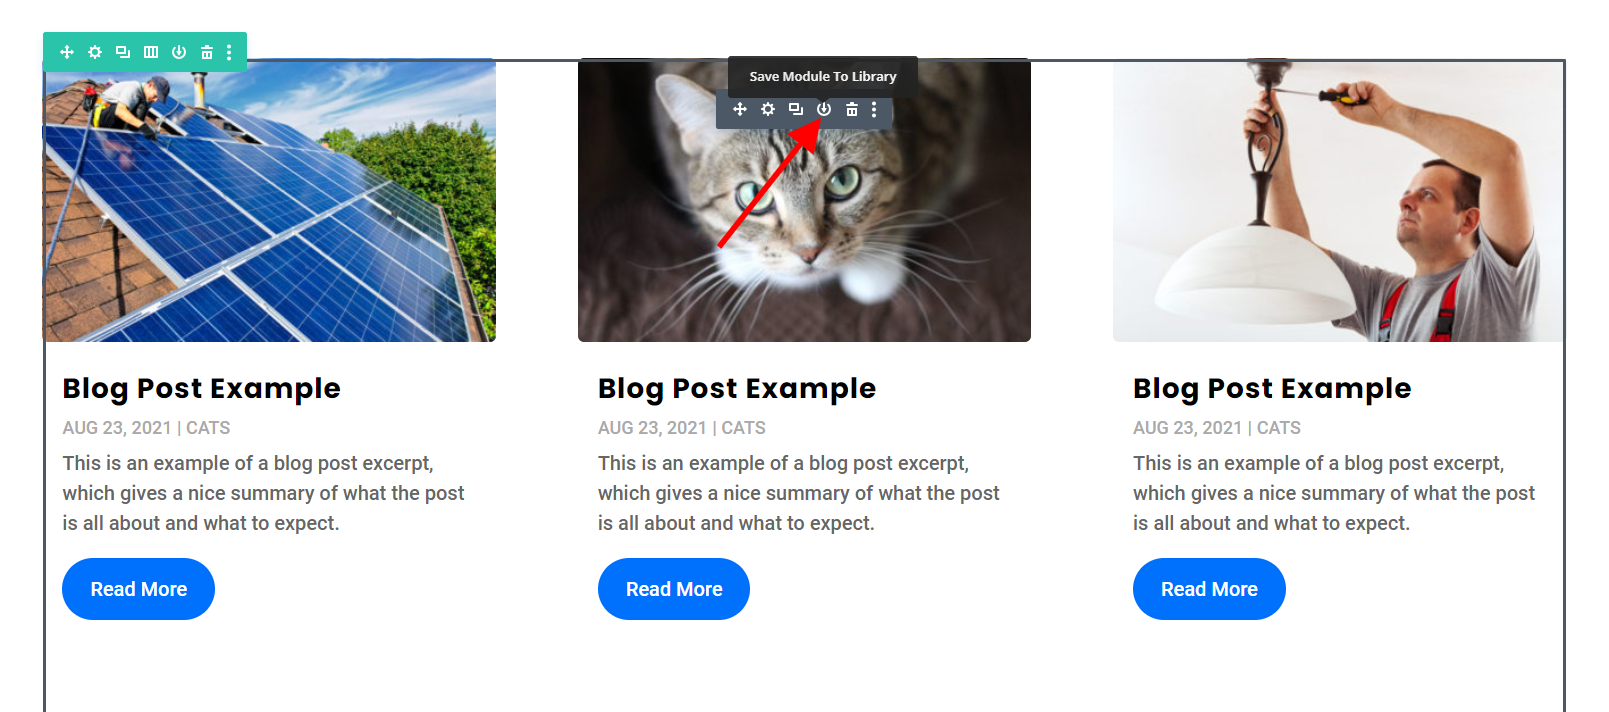
When you are completely finished adjusting the design and settings of your multiple Divi Blog modules, the next step is to save each one to the Divi Library. Click on the “down” icon that says “Save Module To Library.”
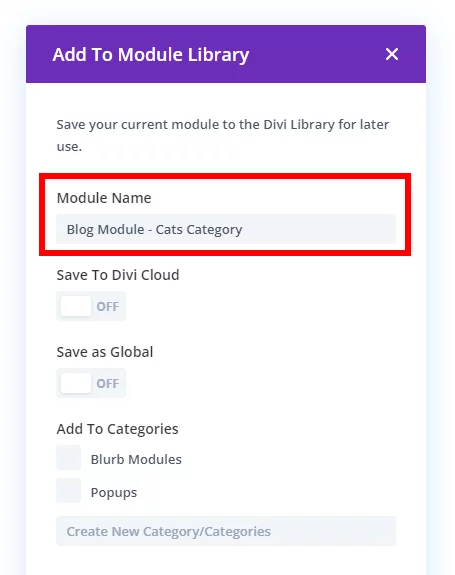
Give the module a name that matches the name of the category selected in that module, which will make it easy to reference later.
Now open the second Blog module and select the checkbox for your second blog category. Repeat this step for as many categories as you intend to show in tabs.
4. Add A Tabs Module
Now you can actually remove all the Divi Blog modules from the page, and replace them with a single Divi Tabs module. In the next step, we will add the Blog modules into each tab. But for this step, focus on the tabs. Take some time and get them set up and styled however you want.
NOTE: Most likely you will find the default Divi Tabs module very limited, so if you want to add hundreds of new functionality and design settings, check out our Divi Tabs Maker module.
5. Add The Divi blog Modules To The Tabs
The last step is about adding the Divi Blog modules that you saved to the Divi Library in step #3 into each of the tab content areas of the tabs module. But here’s the catch – you cannot do this by default in Divi without a plugin. Thankfully there are some great options, including free options! You will need one of these methods:
- Divi Tabs Maker
- Native Divi Tabs module + Divi Dynamic Helper
- Native Divi Tabs module + shortcode plugin (included in Divi Assistant)
Each of these will end up with the same result, and it is up to you to decide which one you want to do based on your level of experience with it.
Each of these will end up with the same result, and it is up to you to decide which one you want to do based on your level of experience with it.
Free (But More Advanced) Method
The free option that I recommend is a plugin in the WordPress plugin repository called Simple Divi Shortcodes.
- Install the plugin
- Go to Divi>Divi Library
- Click on one of the Blog modules saved there
- Copy the post ID from the address bar at the top of the page.
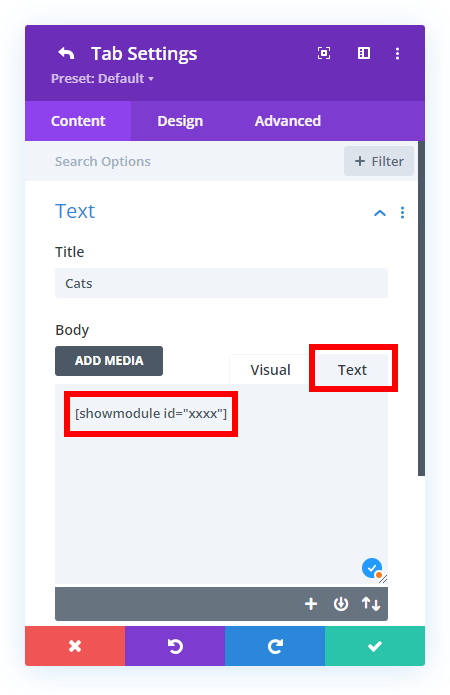
- Go to the tabs module and open an individual tab that corresponds to that blog module category
- Be sure to click the “Text” tab in the Body text area
- Write the shortcode [showmodule id=”xxxx”]
- Paste the ID copied from step 4
Paid (But Super Simple) Method
If you own one of our plugins, either the Divi Tabs Maker mentioned above, or our Divi Dynamic Helper, you can make things so much easier and just use dynamic content! This feature is available in both plugins and will work very similary!
First, go to the content area of the tab and click the dynamic content icon in the top right corner.
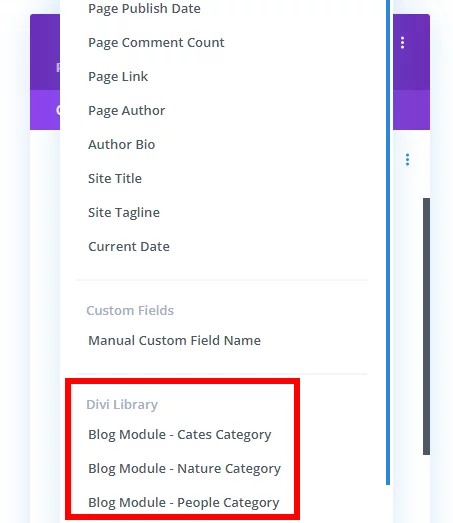
This opens up a window with all the dynamic content options, but most importantly is a new custom section of options which is added by our plugins. Here is a heading called Divi Library and any of the items that are added to it. Simply select the blog module, and it will now display it inside this tab!







Love it 😁 Thanks again for all of your tutorials. I refer to them often
I’m glad you like! You are welcome!
thank you!
I’ve been looking for a solution for this. but the problem i keep running into is that if my client ever adds a new category, it won’t work unless we make a new module in the library and add a new tab.
any solutions?
What you described is exactly what this tutorial shows you how to do, so that is the solution. There would definitely be no way to do automatically what is done in this tutorial.
Hi, I got everything to work to show the blog posts inside the tab module, except when I click “view older posts”, the module seems to time out. Any suggestions?
Hi Daniel!
Can you please share the URL of the page to investigate further?
I love your videos and thank you so much for spending time creating them. I am trying to create a blog on my site and have watched the video and read the post through many times.
I created my layout and saved the 3 blog modules to the layout library.
I created the tabs and added the 3 different shortcodes. However each of my three tabs shows the same categories.
Does this plugin no longer work? or what could I have done wrong.
Each tab has a different shortcode reference as per your intructions.
I have tried 4 times each time starting from scratch and still the same result.
Hi Simon!
I have tested the customization again and everything seems fine to us. Please make sure to select the category before saving it to the layout and make sure to use the latest version of the plugin.
If the issue persists, share the URL of the page.
Hi, I did everything as you described, but it does not work properly.
Only the same category appears on each tab. Everything is set up well. I tried 3 times already
Hi Buzas!
Can you share the URL of the page so that I can check further?
Dear friend, I found the error in the meantime…
I replaced these sins: ” with this: ‘
And now everything works fine!
Thanks, for your brilliant tutorials!
Hi all,
The Buzás János’ solution works for me too! Thanks for the tip 🙂
I just replace de symbol ” for the symbol ‘ inside the shortcode, where the ID number is.
Best for all and thanks to the Pee-Aye team,
Rubén, from Lima (Perú)