A Clever Trick To Target The Background Image
The filter affect design settings in Divi such as the blur effect are nice, but they have a huge flaw with how they work. Usually you want to only affect the background image itself, but if you use one of the settings, you will notice it applies to the entire section, including the modules within it. So in this tutorial I will show you a clever trick about how to apply a blur or other filter effect only to the background image of a Divi section or row but not affect the modules.
▶️ Please watch the video above to get all the exciting details! 👆
Final Result
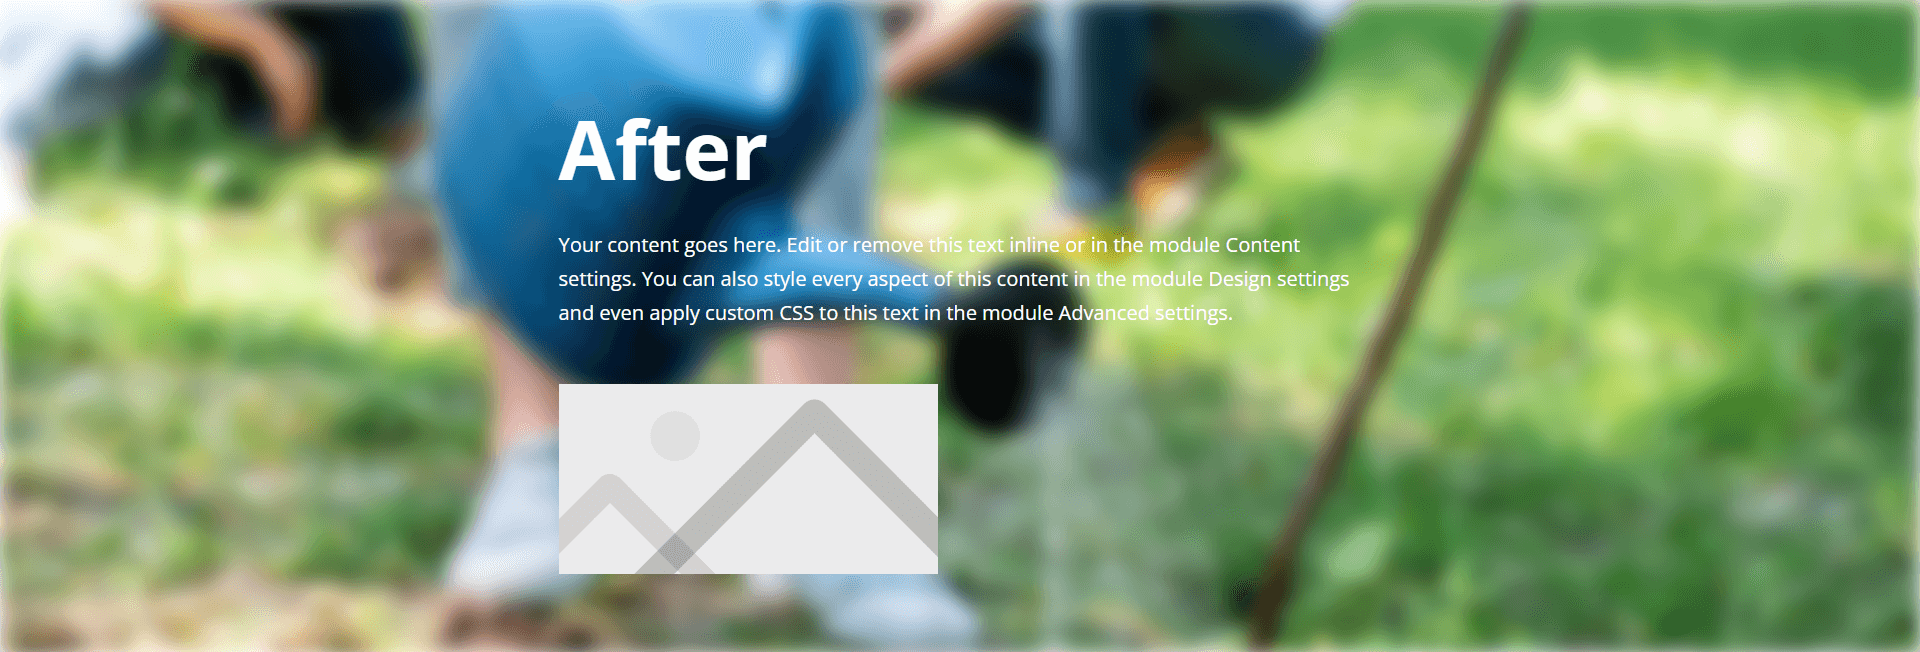
Here are screenshots of the final result before and after from the live example we used in the written and video tutorial embedded below.

Problem: The Divi Filter Effect Design Settings Affect Everything Instead Of Just The Background Image
All Divi sections, rows, and modules have design settings to apply and adjust filter affects. You can access these from the Design tab in the Filters toggle.
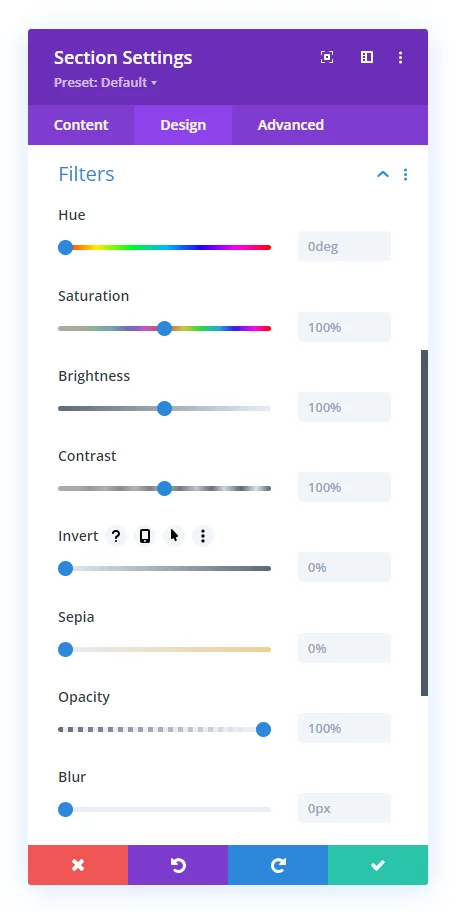
The Filter Effects Affect Everything – Not Just Background
But there is a big problem with the way these filter effects work – or at least in how I would expect them to work at a practical level. The key is this: they affect the entire section or row, including the content like any text or images or other modules. Ideally it should only affect the background image.
Target Just The Background With CSS?
The solution to this is to isolate the background image from the other elements within it. Sounds easy, right? Wrong! I have spent hours trying to target just the background image of a section, and concluded it is impossible.
Aha, A Clever Trick!
Then I stumbled upon a clever trick. I remembered my old tutorial about parallax effects and how it adds a new selector “et_pb_parallax” to the section. Then I realized this was the solution to target only the background image of a Divi section but not apply the effects to the modules with it. I hope you enjoy this clever trick!
Add A Custom CSS Class To The Section Or Row
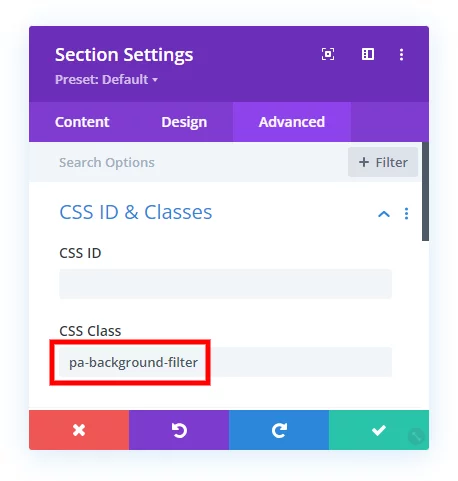
The first step to apply the blur affect or other filter effect to the background image of a section or row is to add a custom CSS class so that we can target this specific section or row with some code. Open the section or row settings and go to the Advanced tab to the CSS ID & Classes toggle and paste the class “pa-background-filter” in the CSS Class input field.
Enable Parallax Effect…but Wait!
The second step is to go to the section or row settings to the Background toggle to the background image tab. Here you need to enable the “Use Parallax Effect” setting. Also be sure to select “CSS” as the “Parallax Method” setting.
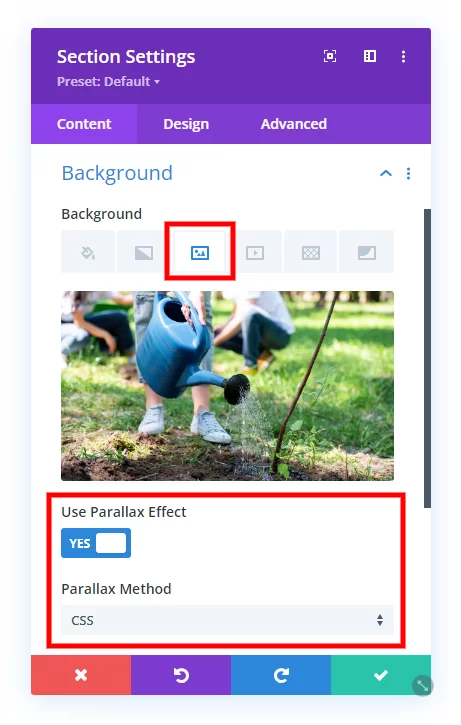
But wait, I know what you are thinking, “What if I don’t want to use parallax?” I totally understand that, and don’t worry, I got you covered.
Optional: Disable The Parallax With CSS
The reason we needed to enable it with the setting, but then disable it with code, is to get the “et_pb_parallax_css” class. This is super important because without it, there is no class available to target only the background image.
/*disable parallax affect*/
.pa-background-filter .et_pb_parallax_css {
	background-attachment: inherit !important;
	background-position: 50%;
}
.pa-background-filter is the class selector for the section or row that contains the background you want to target.
.et_pb_parallax_css is the class used by Divi for elements with a CSS parallax background effect.
background-attachment: inherit !important; sets the background-attachment property to inherit, which overrides the parallax background attachment setting. The !important flag is used to give this higher specificity and ensure it takes precedence over the actual parallax setting in Divi.
background-position: 50%; sets the background position to 50%, which places it at the center in order to match the way it looks when parallax is not enabled.
Add CSS To Apply The Blur Effect Or Other Filter Effect To Divi Background Images
The last step is to create and add the CSS to your website that will apply the blur effect, or other desired filter affect to the background image in Divi. I will provide an example of code you can use and which you can easily customize it according to your preferences.
If you are using our free Divi child theme, place this snippet into the style.css file. Otherwise, place this in your Divi>Theme Options>Custom CSS code box. If you need help, check out our complete guide on Where To Add Custom Code In Divi.
/*apply a blur or other filter effect to the background image*/
.pa-background-filter .et_pb_parallax_css {
	filter: blur(10px); /* Adjust the blur amount as needed */
	-webkit-filter: blur(10px); /* For Safari */
}
.pa-background-filter is the custom class selector for the section or row that contains the background image you want to target.
.et_pb_parallax_css is the class used by Divi for elements with a CSS parallax background effect.
filter: blur(10px); sets the filter property to apply a blur effect to the background image, with a blur radius of 10px. You can adjust the 10px value to make the blur effect stronger or weaker.
-webkit-filter: blur(10px); is included for Safari compatibility, as some older versions of Safari may require the -webkit-filter property.







Thank you very much for the tutorial! That’s exactly what I was looking for. It’s a shame that it doesn’t work natively with a Divi setting, but the main thing is that there is still a relatively simple solution. Maybe this will also be integrated into Divi 5.
Best regards
Falk
Yes things like this will be easier to add after Divi 5.0!
Great trick for section images. I can’t get the backdrop-filter effect to work in a divi fullwidth slider within the slider text overlay. This effects works for the slider description area, but not the text overlay. Strangely, just ‘ filter: blur(Xpx) ‘ works — but of course it blurs the whole overlay, not just the background. Ever run into this problem before?
Hi Stacey!
Try adding the following code in Slider Settings > Advanced > Custom CSS > Slide description and see if it helps.
backdrop-filter: invert(80%);