No More Single Vertical Column
The Divi Contact Form checkboxes and radio buttons show in single, vertical, stacked layout. This takes up valuable space and is not helpful if more than a few options are added. So in this tutorial I am going to solve the problem and to show you how to make the checkboxes and radio buttons in the Divi Contact Form module either inline horizontal or how to display them in columns!
▶️ Please watch the video above to get all the exciting details! 👆
FYI: You can do this with a setting directly in the Divi Contact Form module with our popular Divi Contact Form Helper plugin! Take a look, it is so easy!
How To make The Divi Contact Form Checkbox Or Radio Buttons Inline
1. Add A Custom CSS Class To The Divi Contact Form
The first step in the tutorial is to add a custom CSS class to the Contact Form module. This is used to target the correct module with the code in order to only make the checkboxes and radio buttons inline on a specific module. If you want to affect all Contact Form modules on your site, you can skip this step and also remember to remove all custom class prefixes from the code.
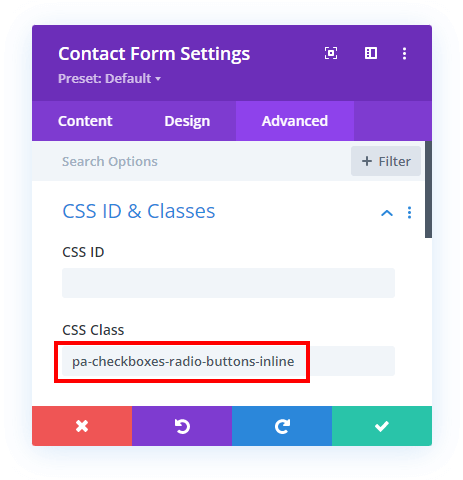
To add the custom class, open the module settings and go to the Advanced tab. Go to the CSS IDs & Classes toggle. Place the class “pa-checkboxes-radio-buttons-inline” in the CSS Class input field of the Contact Form module.
2. Add The Custom CSS
The second step is to add the custom CSS code to your website. This variation of the tutorial requires only a few lines of CSS, so it is very easy and straighforward.
Where To Paste The CSS Code
1. Divi Assistant
If you are using our Divi Assistant plugin, simply paste the code in the CSS tab in the custom code window in the Divi Visual Builder.
2. Child Theme
If you are using a child theme, paste this code into the style.css file. If you don't have a child theme, you can generate a child theme directly on your site or download our free child theme.
3. Divi Theme Options Integration
Otherwise, paste this code in your Divi>Theme Options>Custom CSS code box.
If you need help understanding where to paste the code, please check out our complete guide about where to add custom code In Divi.
/*Make The Divi Contact Form Checkbox Or Radio Buttons Inline*/

.pa-checkboxes-radio-buttons-inline .et_pb_contact_field_options_list span {
	display: inline-block;
	margin-right: 30px;
}
The code is targeting the options list, which is the parent container of the checkboxes and radio button. The display inline-block affects how the child items within that parent display. In this case, the child items are the checkboxes and radio buttons, and they will now display inline horizontally instead of stacked vertically. We also add the 30px of margin to the right to help with spacing, but you can adjust that as needed.
How To Display The Divi Contact Form Checkbox Or Radio Buttons In Columns
1. Add A Custom CSS Class To The Divi Contact Form
The first step in this variation of the tutorial is also to add a custom CSS class to the Contact Form module. This is used to target the correct module with the code in order to only make the checkboxes and radio buttons display in columns on a specific module. If you want to affect all Contact Form modules on your site, you can skip this step and also remember to remove all custom class prefixes from the code.
NOTE: Keep in mind if you want to use a different number of columns on different forms, you will need to create a separate custom class and snippet.
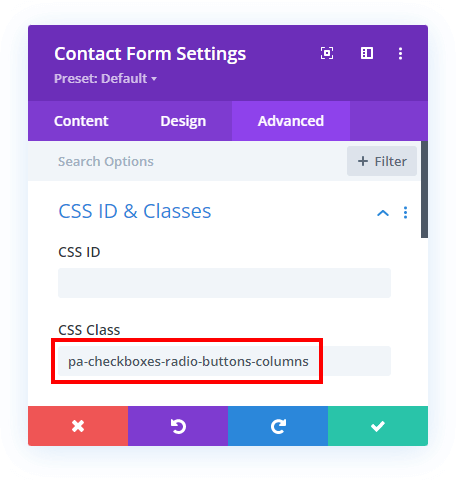
To add the custom class, open the module settings and go to the Advanced tab. Go to the CSS IDs & Classes toggle. Place the class “pa-checkboxes-radio-buttons-columns” in the CSS Class input field of the Contact Form module.
2. Add The Custom CSS
The second step is to add the custom CSS code to your website. There are two parts to this snippet, but overall it is very simple and will be easy to follow.
Where To Paste The CSS Code
1. Divi Assistant
If you are using our Divi Assistant plugin, simply paste the code in the CSS tab in the custom code window in the Divi Visual Builder.
2. Child Theme
If you are using a child theme, paste this code into the style.css file. If you don't have a child theme, you can generate a child theme directly on your site or download our free child theme.
3. Divi Theme Options Integration
Otherwise, paste this code in your Divi>Theme Options>Custom CSS code box.
If you need help understanding where to paste the code, please check out our complete guide about where to add custom code In Divi.
/*Display The Divi Contact Form Checkbox Or Radio Buttons In Columns*/

.pa-checkboxes-radio-buttons-columns .et_pb_contact_field_options_list {
	display: flex;
	flex-flow: row wrap;
}

.pa-checkboxes-radio-buttons-columns .et_pb_contact_field_checkbox,
.pa-checkboxes-radio-buttons-columns .et_pb_contact_field_radio {
	flex-basis: 33%;
}
The first part of the code is changing the display of the parent options list to flex, which lays the foundation for us to then easily set the number of columns using flex basis. We also set the flex-flow to row wrap, which means the items will stack and display horizontal in columns and wrap to the next column as needed. The second part of the snippet is the width of each column, so this obviously is meant to be adjusted however you want. For 4 columns use 25%, for 3 columns use 33%, for 2 columns use 50%, etc.
Do It With A Setting!
Make life easier and use the Divi Contact Form Helper plugin instead, the ultimate Divi Contact Form upgrade with awesome features and settings!
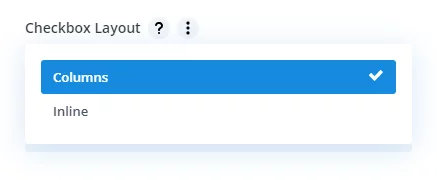
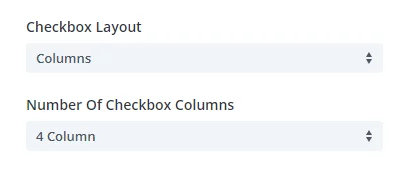
The Divi Contact Form Helper plugin has the option to choose to show the checkboxes and radio buttons inline or in columns with a simple selection setting! If you choose columns, the next setting appears to select the number of columns. Couldn’t be easier than that!







Thanks bro, how do I make it so that it can be checklisted more than 1 button?
Hey Jason,
Checkbox are meant to be work in a scenario where you can select more than one option and this is what’s happening on your website as well.
Hi,
This is great. Thank you for sharing. How do I adjust to 3 columns for desktop but 2 colums for mobile as it looks a little cramped on mobile.
Hi Louise!
Please add the following code to have 2 columns on mobile:
@media all and (max-width: 767px){
.pa-checkboxes-radio-buttons-columns .et_pb_contact_field_checkbox,
.pa-checkboxes-radio-buttons-columns .et_pb_contact_field_radio {
flex-basis: 50%;}
}
Let me know how it goes!
Great tutorial as always thank you.
Above the checkboxes or options is the question or title. Could I ask where the style is for that please as it seems to be set somewhere and I cannot find it.
Thanks for your help.
Hi there!
Use the code to change the title above the radio buttons:
.et_pb_contact_field_options_wrapper .et_pb_contact_field_options_title{
color: red;
}
You can also use custom class for specific contact form module.