Divi Contact Form DB
One of the missing features with the Divi Contact Form module is that emails are not saved in the database, which means you could totally miss entries or important details when a form is submitted. Saving the entries to the database is a great backup to ensure you never miss an entry, even if the admin email does not properly send for some reason. But don’t worry, because now you can have peace of mind! In this tutorial, I will show you how to save the Divi Contact From module entries to your WordPress database by using our popular Divi Contact Form Helper plugin by Pee-Aye Creative.
▶️ Please watch the video above to get all the exciting details! 👆
1. Install The Divi Contact Form Helper Plugin
Since Divi does not have this feature, the first step is to install the Divi Contact Form Helper plugin. Hopefully by now, most of my weekly blog readers are already using this plugin (especially if you are members of our all-access Divi Adventure Club), but if not, be sure to check the product page to learn more. The plugin adds over 100 main settings and features directly to the existing Contact Form module, including saving entries to the database.
2. Enable Setting To Save Entries To Database In The Divi Contact Form Module
Go to your Divi Contact Form module and open the settings. You will notice many additional settings added by our plugin. Open the “Submission Entries” toggle and make sure the “Save Entries To Database” setting is enabled. This should be enabled by default, but be sure to double-check, as this is the most important setting.
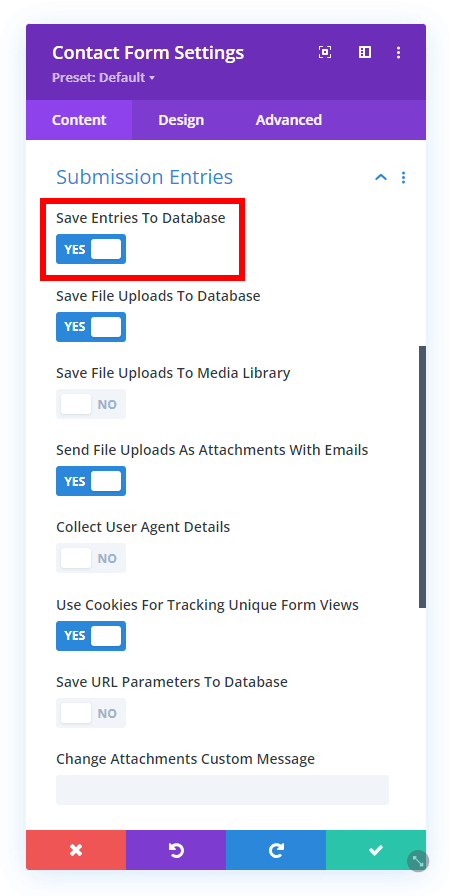
Notice there are lots of other great settings and options to choose too, but for this tutorial we will stay focussed, and you can learn more on our product page or documentation.
3. Ensure The Module Has A Unique ID
In order for entries to be saved in the website database, the form itself needs to have some kind of connection with the database. By default, the regular Contact Form is just a module on the page that works independently and is not connected to anything else. So to solve this, we created a new feature in our plugin that assigns a unique ID in the Admin Label toggle of each contact form. This ID is then used to connect to the database and identify which entries come from which form.
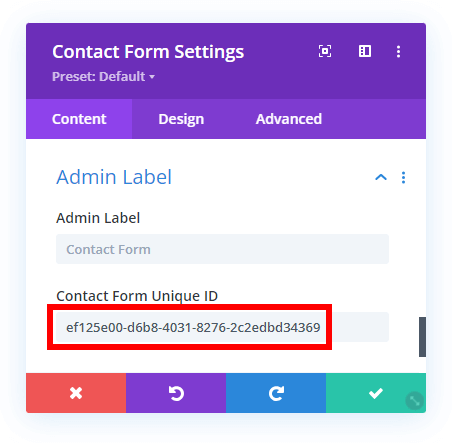
Keep in mind that if you have more than one form on your site, each one MUST be unique (and will be by default unless you duplicate the module with the duplicate button in the Divi Builder). We have more information about using unique IDs in our plugin documentation.
4. Viewing And Managing Entries
View The List of Entries
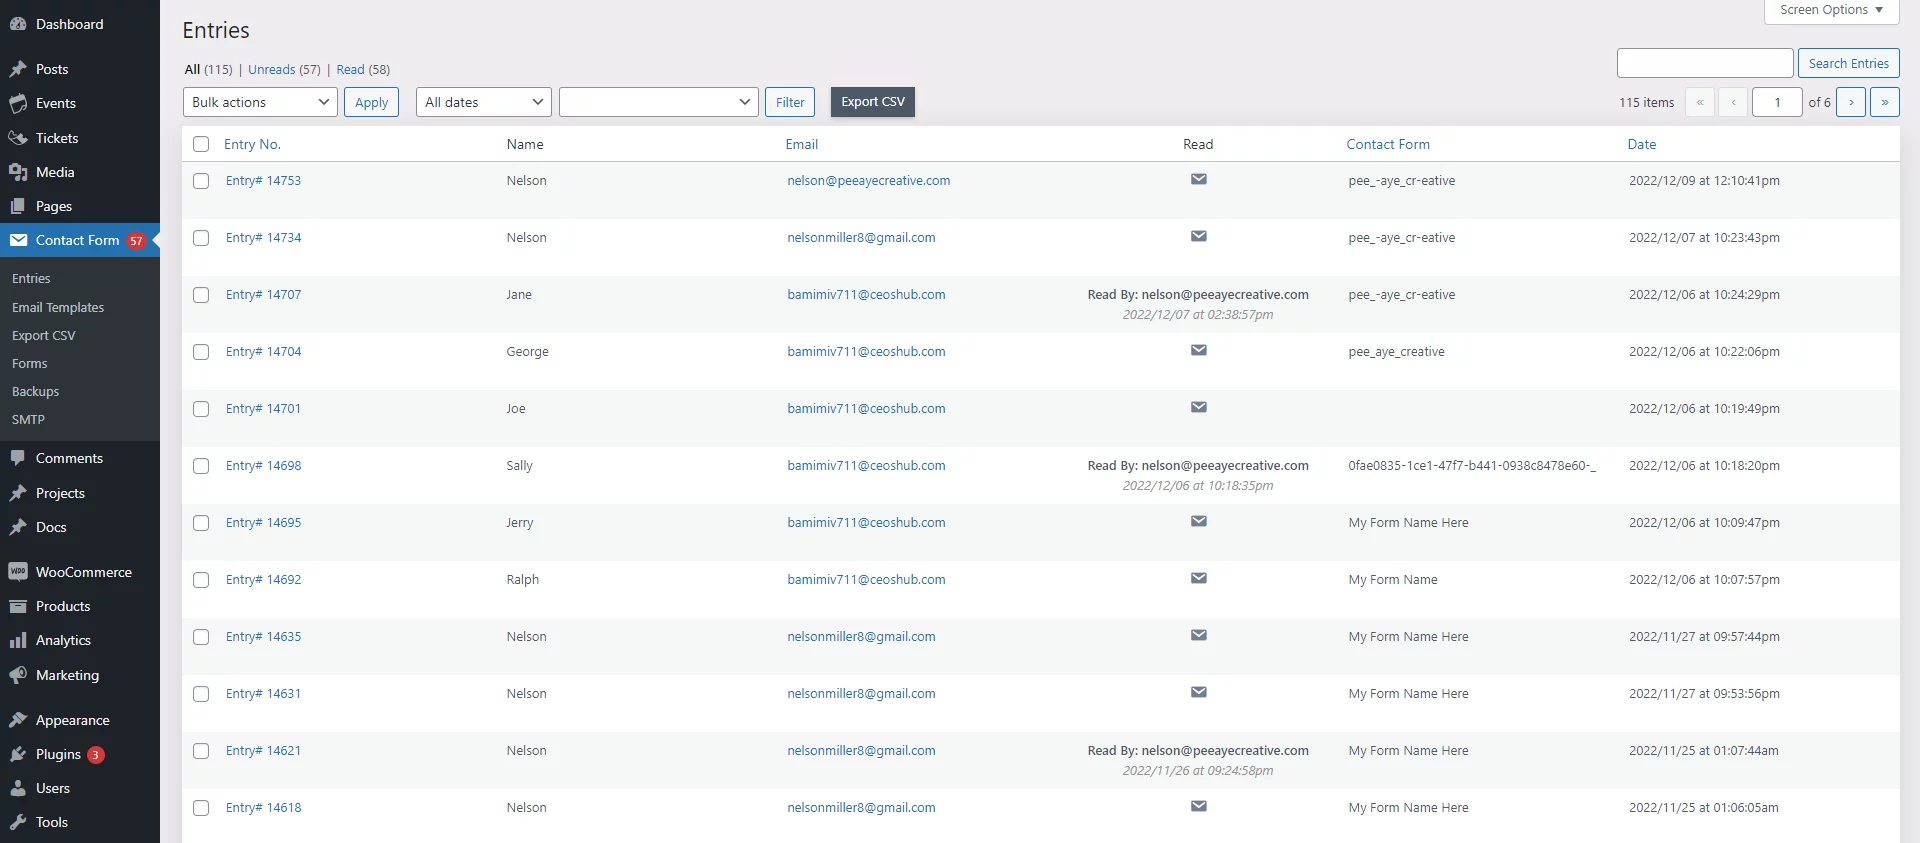
When new forms are submitted, the entries will now appear in a list under the “Contact Form>Entries” menu in your WordPress dashboard. This screen will show a list of all the entries with various details such as the entry number, name and email address, read or unread status, and date and time.
View An Individual Entry
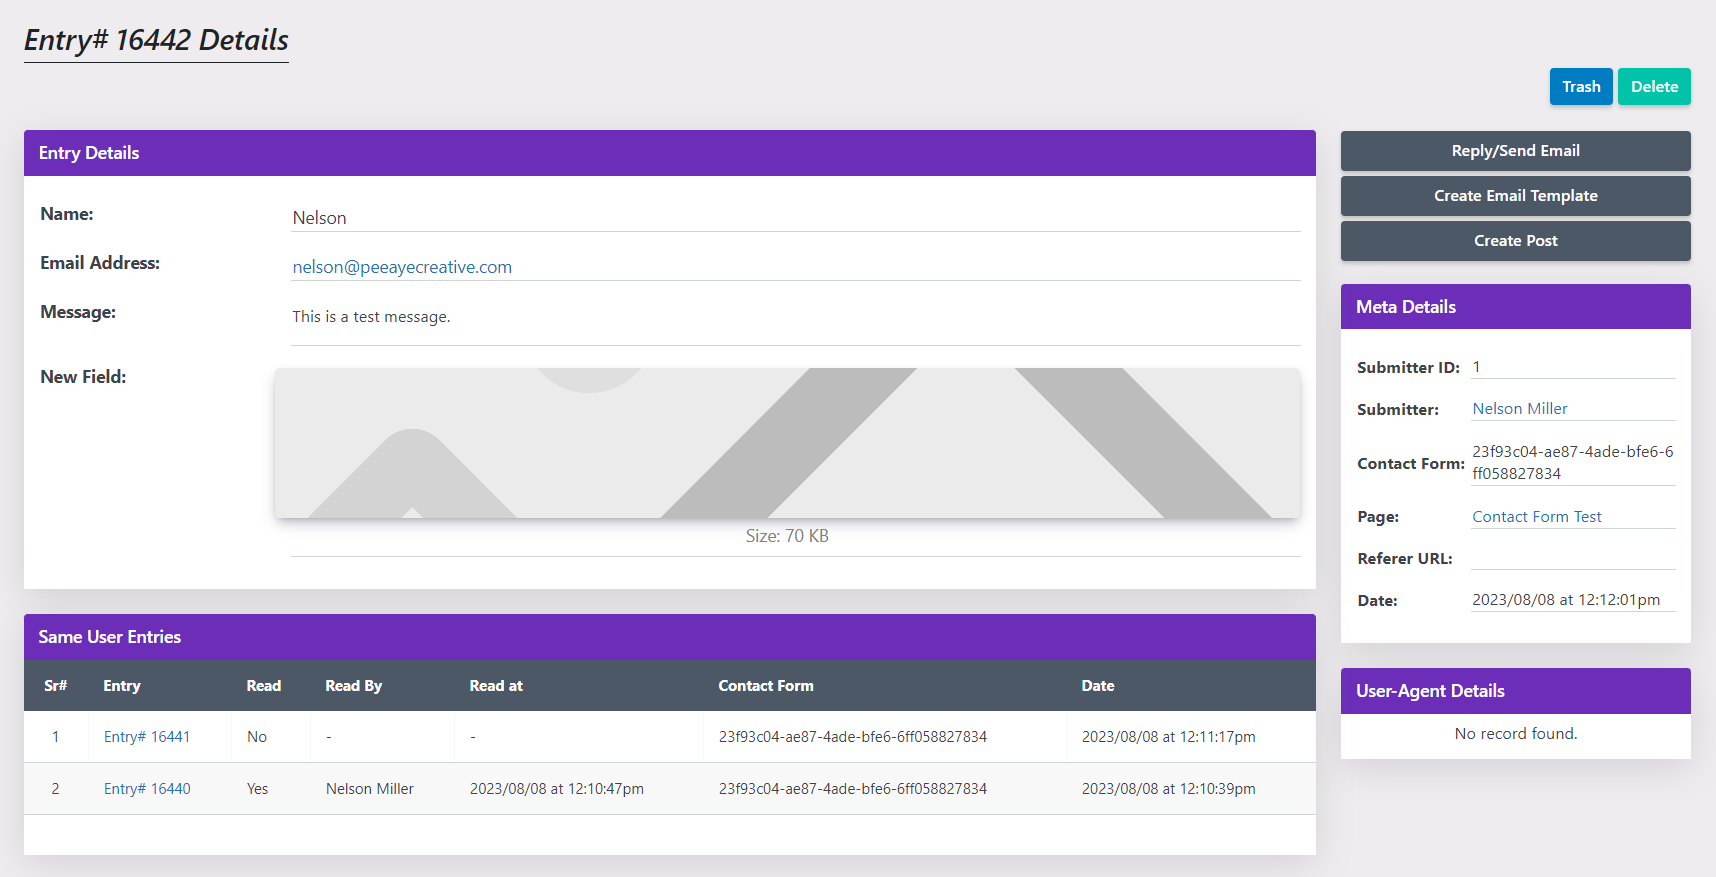
You can click on an entry number from the entries list to view an individual entry. This screen will have all the details and data from the entry.
Entry Details
On the left side of the page, all the form fields will appear with their respective field data. In this example, Name, Email Address, Message, and New Field are the labels of the form fields used in the module. To the right of each field label is the data which was inputted into the form from the person who submitted it. Any files from the file upload field will also appear here.
Same User Entries
At the bottom of the page are any other entries that were previously submitted from the same person (based on email address).
Actions
On the right side of the page are some available actions such deleting the entry, replying to the entry, creating an email template from the entry, or creating a post by mapping the fields to a custom post type.
Meta Details
Below the actions on the right side of the page are some standard meta details such as the contact form identifier, the page it was submitted from, the referrer URL, and the timestamp.
User Agent Details
Below the meta details on the bottom-right side are any optional user agent details (only if setting is enabled) such as IP address, browser, and operating system.
Export Entries To CSV
Once you have entries saved in the database, you can optionally choose to export them to a CSV file. You can learn more about exporting entries to CSV in our documentation.
Auto Backup Your Entries
If you want to automatically back up your entries to an external location, you can set up a schedule such as every day, week, or month. This will send an email with a CSV file attached. You can learn more about automatically backing up entries in our documentation.
Auto Delete Your Entries
Some countries or regulations require data to be deleted after a specific period of time. If you need to delete your entries after 14 days, for example, you can do this automatically. You can learn more about automatically deleting entries in our documentation.







Hey Nelson, Thanks! This is super helpful. I wanted to use Divi instead of gravity forms for a contact form and this makes it doable. Very appreciated!
You’re welcome Torie! Yes this turns the Divi Contact Form into a profession contact form! Really glad you like it.