Show Which Fields Are Required
One of the missing features in the Divi Contact form module is something that is usually standard on other forms – asterisks for required fields! But don’t worry, it’s easy to add these! In this tutorial, I will show you how to show an asterisk on any required field in the Divi Contact Form module!
▶️ Please watch the video above to get all the exciting details! 👆
FYI: You can do this with a setting directly in the Divi Contact Form module with our popular Divi Contact Form Helper plugin! Take a look, it is so easy!
1. Add A Custom CSS Class To The Divi Contact Form
The first step in the tutorial is to add a custom CSS class to the Contact Form module. This is used to target the correct module with the code in order to only make this affect only a specific module. This selector is also used in step #2 with the jQuery, so this is important for the code to know which fields to affect.
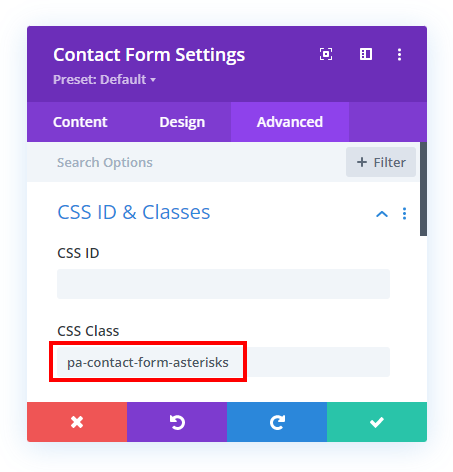
To add the custom class, open the module settings and go to the Advanced tab. Go to the CSS IDs & Classes toggle. Place the class “pa-contact-form-asterisks” in the CSS Class input field of the Contact Form module.
2. Add The Custom jQuery Code Snippet
The second step is to add the custom jQuery code to your website. This step is also very easy, and we are doing the work with only a few lines of code. Simply copy the jQuery snippet below and place it into your Divi website.
Where To Paste The jQuery Code
1. Divi Assistant
If you are using our Divi Assistant plugin, simply paste the code in the jQuery tab in the custom code window in the Divi Visual Builder.
2. Child Theme
If you are using a child theme, paste this code into the scripts.js file (don't forget to remove the <script> tags at the beginning and end). If you don't have a child theme, you can generate a child theme directly on your site or download our free child theme.
3. Divi Theme Options Integration
Otherwise, paste this code in your Divi>Theme Options>Integrations tab in the "Add code to the < head > of your blog" code area.
If you need help understanding where to paste the code, please check out our complete guide about where to add custom code In Divi.
<script>
jQuery(document).ready(function(){
    jQuery(".pa-contact-form-asterisks *").each(function(){
        if(jQuery(this).attr('data-required_mark') == 'required' && !jQuery(this).hasClass('et_pb_contact_captcha')){
            var x = jQuery(this).attr('placeholder');
            var x = jQuery(this).attr('placeholder',x + ' * ');
        }
    });
});
</script>
After adding and saving the code, exit the Divi Builder and view the form on the frontend (the code only takes effect on the frontend). You will see any fields that are set to required will now have an asterisk.
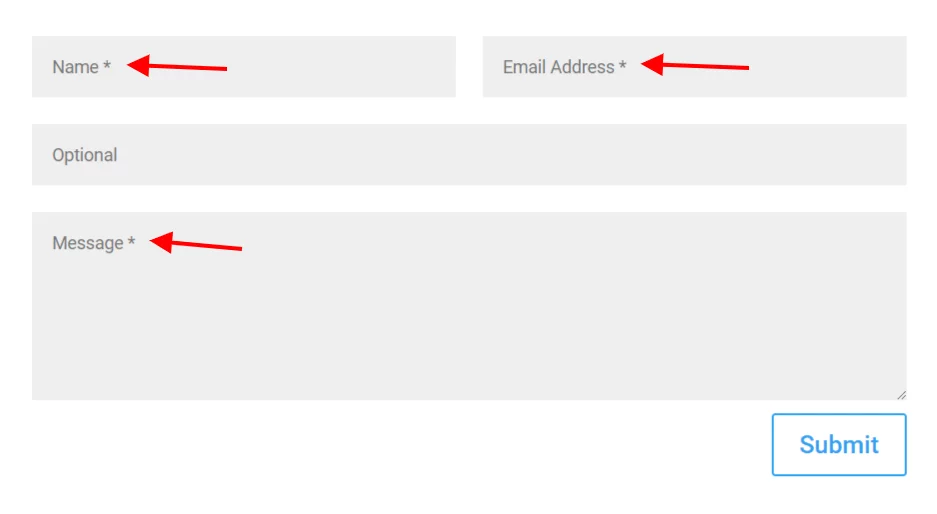
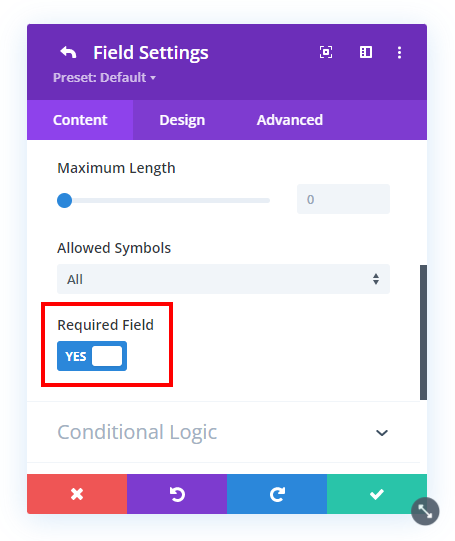
The code is checking for any field within the contact form with the custom class that has the attribute of “required” within the code. This attribute is visible in the code when the “Required Field” setting is enabled. Our code simply finds it, then finds the placeholder text of that field, and adds an asterisk symbol after the placeholder text.
Do It With A Setting!
Make life easier and use the Divi Contact Form Helper plugin instead, the ultimate Divi Contact Form upgrade with awesome features and settings!
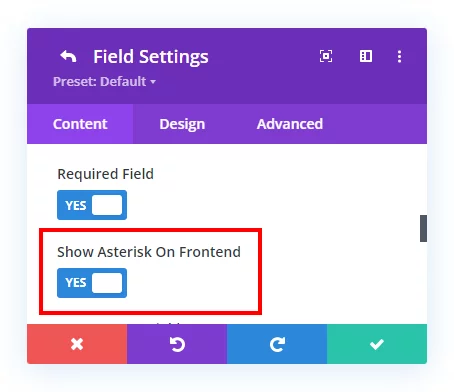
The Divi Contact Form Helper plugin has a toggle setting to quickly add an asterisk to any required fields. If you are showing the field label text, it will place it there, or if not it will place it on the placeholder text. Using the plugin can save you loads of time and add lots of additional functionality. Be sure to check out all the other amazing features!






Hey Nelson, Thanks for this great tutorial.
But this is not working with checkboxes, radio fields, and dropdown. Can you please add a code for it.
And also when we use labels on top by following your tutorial: https://www.peeayecreative.com/how-to-move-labels-above-input-fields-in-the-divi-contact-form/ asterisks are not showing on top labels. Is this possible?
Some of these things are just limitations of Divi, so I will recommend investing in the plugin which solves both issues.
Pschschschschsch … there is a secret third item in the list:
“3. The no code and module way -> Fill in the title text and press * (it is the one key with the plus sign on the keyboard) and you are ready to go”
You didn’t mention it in your article, there is nothing wrong with this method or have I made a mistake for the last 10 years? https://imgur.com/a/ucNOsKz
As they say, “Whatever works” sounds good to me.
Thanks Nelson, so what is the simplest way to add * Required field within the form? I feel the asterisks is great but really need some text below saying that.
If you have our plugin, you could use the description field for that, it would work nicely.
How can we make this work if we followed your tutorial on adding the form field text above the fields?
Hi David!
Thanks for bringing this to our attention. Both the customization don’t go together as of now. We will look further into it and update the guide.